Pioneer Mini Split Installation Manual: A Comprehensive Guide
This manual details the installation process for Pioneer mini split systems‚ covering everything from unboxing to operation‚ ensuring a cool summer for your tiny home!
Proper tools and adherence to installation instructions are crucial‚ as demonstrated in various online videos showcasing the WYS-22 Quantum series and other models.
Whether it’s a workshop in Florida or a tiny home‚ this guide provides a step-by-step approach to successfully install your new air conditioning and heating system.
Understanding Pioneer Mini Split Systems
Pioneer mini split systems offer a ductless heating and cooling solution‚ ideal for additions‚ renovations‚ or spaces lacking traditional ductwork. These systems consist of an outdoor condenser unit and one or more indoor air handling units‚ connected by refrigerant lines and electrical wiring.
Unlike central air systems‚ mini splits allow for zoned temperature control‚ meaning you can heat or cool individual rooms independently‚ saving energy and increasing comfort. Pioneer offers various series‚ like the WYT and WYS Quantum series‚ each designed for specific cooling capacities and efficiency levels.
Understanding the components – the compressor‚ condenser coil‚ evaporator coil‚ expansion valve‚ and refrigerant – is key to successful installation. These systems utilize a heat transfer process to move heat from inside to outside (cooling) or vice versa (heating). Proper installation‚ following the manual carefully‚ ensures optimal performance and longevity of your Pioneer system.
These systems are becoming increasingly popular‚ especially in tiny homes‚ due to their efficiency and ease of installation‚ as highlighted in numerous online resources and video tutorials.
Safety Precautions Before Installation
Prior to installing your Pioneer mini split system‚ strict adherence to safety guidelines is paramount. Installation should only be undertaken by qualified individuals familiar with HVAC systems and electrical work. Always disconnect power to the intended circuit before commencing any electrical connections.
Refrigerant handling requires specialized knowledge and EPA certification. Improper handling can lead to environmental damage and personal injury. Wear appropriate personal protective equipment (PPE)‚ including safety glasses‚ gloves‚ and potentially a respirator when working with refrigerant lines.
Ensure the indoor and outdoor units are securely mounted to prevent falls or vibrations. Be mindful of weight limits and use appropriate mounting hardware. Carefully read the installation manual for specific warnings and cautions related to your Pioneer model.
Always follow local codes and regulations regarding HVAC installation. Ignoring these precautions can void your warranty and create hazardous conditions. Prioritize safety throughout the entire process.
Tools Required for Installation
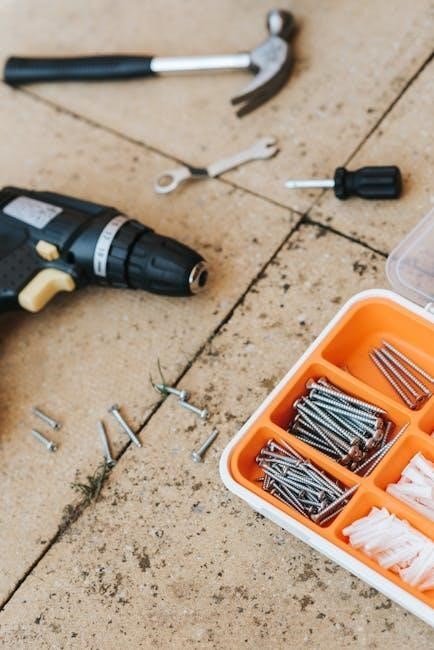
Successful installation of your Pioneer mini split system necessitates a specific set of tools. Essential items include a flaring tool for precise copper tubing preparation‚ a vacuum pump to evacuate the system of air and moisture‚ and a manifold gauge set for monitoring refrigerant pressures.
Electrical work demands wire strippers‚ a multimeter for voltage checks‚ and appropriate connectors. Drilling tools are needed for mounting brackets‚ alongside a level to ensure proper unit alignment. A tube cutter facilitates clean refrigerant line cuts‚ while a wrench set accommodates various fittings.
Safety equipment‚ such as safety glasses and gloves‚ is non-negotiable. Depending on the installation location‚ a ladder or scaffolding may be required. Having a screwdriver set‚ measuring tape‚ and marker on hand will also streamline the process.
Refer to the Pioneer system’s manual for any model-specific tool recommendations; Proper tools ensure a secure and efficient installation.
Unboxing and Component Check
Upon receiving your Pioneer mini split system‚ carefully inspect the packaging for any signs of damage during transit. Once opened‚ meticulously verify all components against the packing list included in the manual. This crucial step ensures nothing is missing before commencing installation.
The indoor unit‚ outdoor unit‚ and remote control should be present. Check for the refrigerant lines (copper tubing)‚ mounting brackets‚ and electrical wiring components. Confirm the presence of all necessary hardware‚ including screws‚ bolts‚ and washers.
Inspect each component for any visible defects or damage. Document any discrepancies immediately and contact your supplier. Retain all packaging materials until the installation is complete and you’ve confirmed everything functions correctly.
A thorough component check prevents delays and ensures a smooth installation process‚ safeguarding your investment in a Pioneer system.
Mounting the Indoor Unit
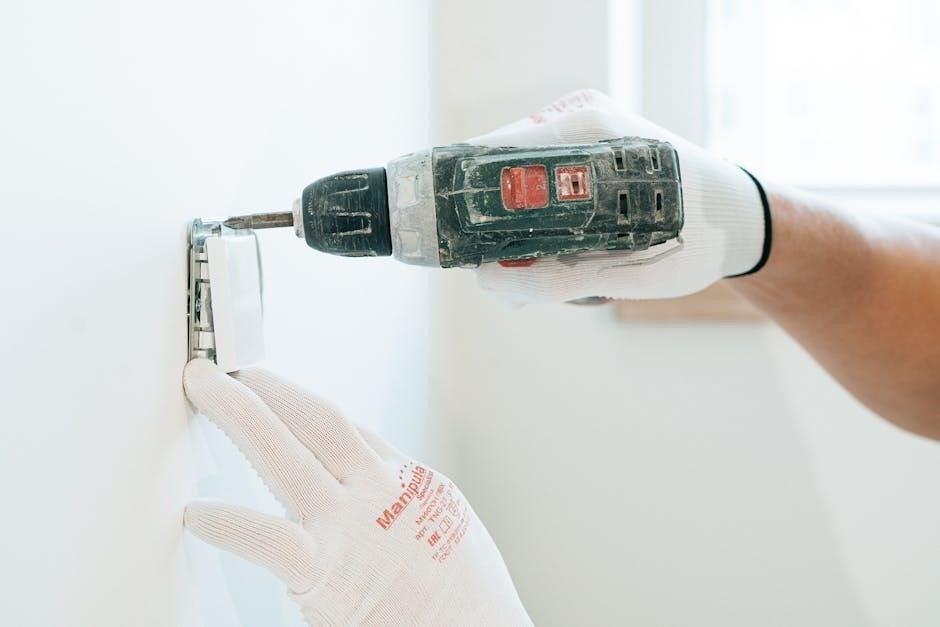
Securely mounting the indoor unit is paramount for optimal performance and longevity of your Pioneer mini split system. Begin by carefully selecting a suitable location‚ considering airflow and accessibility for future maintenance. Ensure the wall can adequately support the unit’s weight.
Utilize the provided mounting bracket as a template to mark the screw holes on the wall. Drill pilot holes and securely fasten the bracket‚ ensuring it is level. Carefully lift the indoor unit onto the bracket‚ verifying it is firmly seated and locked into place.
Double-check the stability of the unit before proceeding. Improper mounting can lead to vibrations‚ noise‚ and potential damage. Refer to the installation manual for specific bracket and screw recommendations based on your model.
A properly mounted indoor unit contributes significantly to the quiet operation and efficient cooling or heating provided by your Pioneer system.
Selecting the Optimal Indoor Unit Location
Choosing the right location for your Pioneer mini split indoor unit is crucial for efficient operation and comfort. Prioritize areas with good airflow‚ avoiding obstructions like furniture or curtains that can restrict circulation. Consider a central location to distribute air evenly throughout the space.
Avoid direct sunlight‚ as this can interfere with the unit’s temperature sensors. Ensure the location allows for easy access for filter cleaning and maintenance. Walls capable of supporting the unit’s weight are essential‚ and proximity to a power source simplifies electrical connections.
Minimize noise transmission by avoiding bedrooms or quiet areas if possible. Refer to the installation manual for specific clearance requirements around the unit. A well-chosen location maximizes the benefits of your Pioneer system.

Careful planning during this stage ensures optimal performance and long-term satisfaction.
Connecting Refrigerant Lines
Properly connecting the refrigerant lines is a critical step in Pioneer mini split installation‚ demanding precision to ensure system efficiency and prevent leaks. Begin by carefully unwrapping and inspecting the copper tubing for any damage. Accurate measurement and cutting are essential for a secure fit.
Flaring the copper tubing correctly is paramount; an improper flare can lead to refrigerant loss and system failure. Use a quality flaring tool and follow the installation manual’s guidelines meticulously. Connect the lines to the outdoor and indoor units‚ ensuring tight connections.
Purging the lines with nitrogen during connection helps remove any air or moisture‚ safeguarding the system’s performance. Double-check all connections for leaks using a refrigerant leak detector before proceeding. This step is vital for a long-lasting‚ efficient system.
Flaring and Connecting Copper Tubing
Achieving a perfect flare on the copper tubing is fundamental for a leak-proof connection in your Pioneer mini split system. Begin by deburring the cut end of the tubing to ensure a smooth‚ even flare. Utilize a flaring tool designed for the tubing’s diameter‚ following the tool’s specific instructions carefully.
Proper flaring requires consistent pressure and a precise angle. Inspect the flare visually – it should be even and free of cracks or imperfections. After flaring‚ carefully connect the tubing to the corresponding fittings on both the indoor and outdoor units.
Tighten the flare nuts securely‚ but avoid over-tightening‚ which can damage the fittings. Use two wrenches to prevent twisting the tubing during tightening. A properly flared and connected line is essential for optimal system performance and longevity.
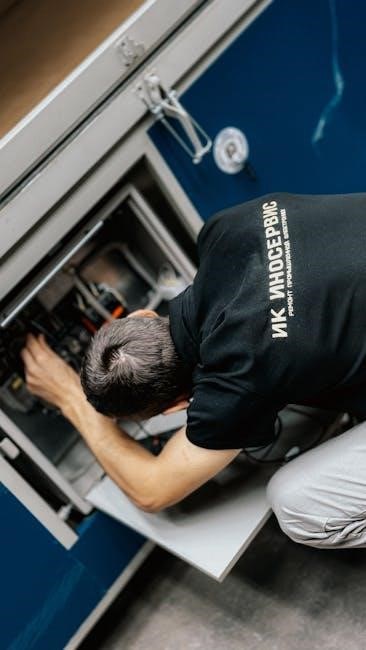
Electrical Connections
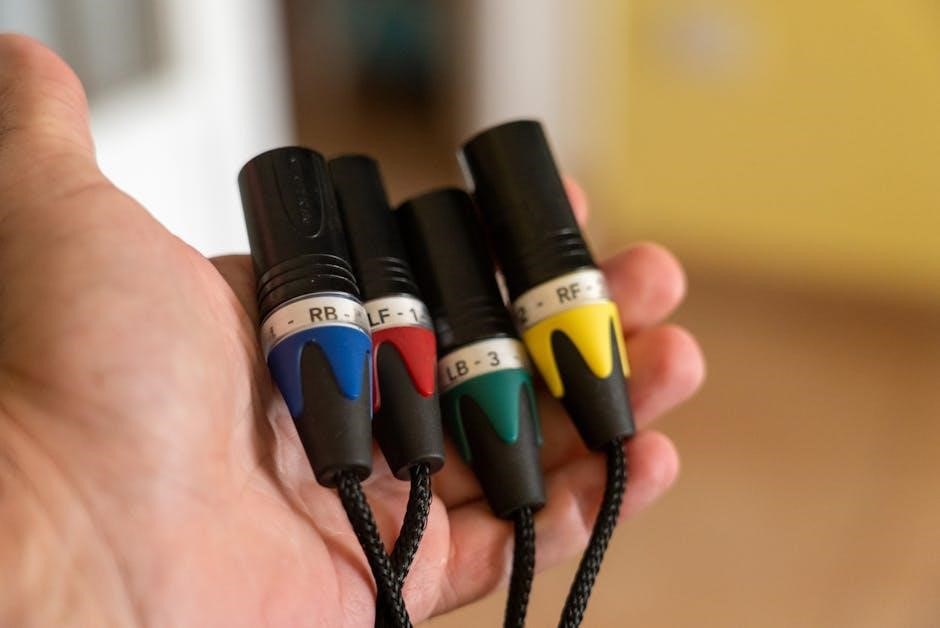
Electrical connections for your Pioneer mini split system require strict adherence to safety guidelines and local electrical codes. Before commencing any wiring‚ ensure the power supply to the unit is completely disconnected at the breaker. Consult the unit’s wiring diagram‚ typically found within the installation manual‚ to identify the correct wiring configuration.
Verify the voltage requirements match your power supply. Incorrect voltage can severely damage the system. Connect the power wires to the designated terminals‚ ensuring secure connections. Grounding is crucial for safety; connect the ground wire to the designated grounding terminal.
Double-check all connections before restoring power. Improper wiring can lead to system malfunction or pose a safety hazard. A qualified electrician should perform or inspect these connections if you are unfamiliar with electrical work.
Wiring Diagram and Voltage Requirements
Pioneer mini split systems necessitate precise electrical connections‚ guided by the unit’s specific wiring diagram. This diagram‚ located within the installation manual‚ illustrates the correct terminal connections for power‚ ground‚ and communication wires. Carefully study this diagram before beginning any wiring work.
Voltage requirements vary depending on the model. Common voltages include 115V or 230V. Confirm the voltage of your power supply matches the unit’s specifications. Using the incorrect voltage will cause immediate damage and void the warranty.
The wiring diagram details wire gauges needed for optimal performance and safety. Ensure you use appropriately sized wiring. A dedicated circuit is highly recommended to prevent overloading. If unsure‚ consult a qualified electrician for assistance.
Vacuuming the System
Vacuuming the system is a critical step in Pioneer mini split installation‚ removing non-condensables like air and moisture from the refrigerant lines. This process ensures optimal performance and prevents potential compressor damage. Utilize a high-quality vacuum pump capable of achieving a deep vacuum – typically 500 microns or lower.
Connect the vacuum pump to both the liquid and gas lines at the indoor and outdoor unit connections. Open the service valves slowly to allow the pump to begin evacuation. Monitor the vacuum gauge closely‚ observing the pressure drop.
Continue vacuuming for a minimum of 30 minutes‚ or longer for longer line sets‚ to ensure complete evacuation. After achieving the desired vacuum level‚ close the service valves and disconnect the pump. A leak test should be performed immediately after vacuuming to verify system integrity.
Charging the Refrigerant
Charging the refrigerant is a precise process vital for Pioneer mini split efficiency. Proper refrigerant type and amount are specified on the unit’s nameplate – typically R-410A. Always consult the unit’s documentation for exact charging weights‚ as these vary by model (like the WYS-22 Quantum series).

Connect a manifold gauge set to the service ports‚ ensuring correct high and low-side connections. Carefully open the service valves‚ allowing refrigerant to flow into the system. Monitor both the pressure and superheat/subcooling readings during charging.
Charge according to the manufacturer’s instructions‚ typically by weight. Avoid overcharging or undercharging‚ as both can significantly reduce performance and potentially damage the compressor. Verify the charge by checking operating pressures and temperatures.
Proper Refrigerant Type and Amount
Pioneer mini split systems predominantly utilize R-410A refrigerant‚ though always verify the specific type indicated on the unit’s nameplate. Using the incorrect refrigerant can cause system failure and void the warranty. The amount of refrigerant required varies significantly based on the model – for example‚ a 9K BTU unit will differ from a 22K BTU system.
Refer to the installation manual for precise charging weights‚ often listed in pounds and ounces. Overcharging can lead to high pressures‚ compressor damage‚ and reduced cooling efficiency. Undercharging results in low pressures‚ insufficient cooling‚ and potential compressor burnout.
Accurate measurement is crucial; use a calibrated refrigerant scale during the charging process. Never vent refrigerant into the atmosphere – it’s environmentally damaging and illegal. Proper handling and recovery procedures are essential.
Testing the System
After completing the installation and refrigerant charging‚ thorough system testing is vital. Begin with a visual inspection‚ checking all connections for leaks – refrigerant lines‚ electrical wiring‚ and drain lines. Power on the indoor and outdoor units‚ observing the startup sequence. Listen for any unusual noises indicating potential issues.
Utilize the remote control to initiate cooling and heating modes‚ verifying proper operation in both settings. Measure the supply and return air temperatures to confirm adequate cooling or heating performance. Check the condensate drain for proper water flow‚ ensuring it’s not blocked.
Monitor the system for at least 30 minutes‚ observing its stability and efficiency. Address any anomalies immediately‚ referencing the troubleshooting section of this Pioneer manual.
Initial Startup and Performance Checks
Upon powering up your Pioneer mini split‚ observe the initial startup sequence. The indoor unit fan should begin circulating air‚ and the outdoor compressor should engage after a short delay. Listen carefully for any unusual sounds – rattling‚ hissing‚ or excessive vibration – which could indicate a problem.
Verify the remote control functions correctly‚ allowing you to adjust temperature settings‚ fan speed‚ and operating modes. Monitor the system’s cooling or heating performance over a 30-minute period. Use a thermometer to measure the temperature difference between supply and return air‚ confirming effective heat exchange.
Check for proper condensate drainage‚ ensuring water is flowing freely from the outdoor unit. Document these initial observations for future reference and troubleshooting‚ as detailed in the installation manual.
Troubleshooting Common Issues
If your Pioneer mini split isn’t cooling or heating effectively‚ first check the air filter for blockage – a frequent cause of reduced airflow. Unusual noises often point to a mechanical issue‚ potentially with the fan motor or compressor‚ requiring professional attention.
Ice formation on the refrigerant lines suggests low refrigerant levels or restricted airflow. Error codes displayed on the indoor unit provide valuable diagnostic information; consult the installation manual for code definitions and recommended actions;
Water leaks can stem from a clogged condensate drain line‚ easily remedied with cleaning. If the system fails to power on‚ verify the electrical connections and circuit breaker. Remember‚ complex repairs should always be handled by a qualified HVAC technician.
Maintenance and Filter Cleaning
Regular maintenance is vital for optimal Pioneer mini split performance and longevity. The most frequent task is cleaning or replacing the air filters – typically every 30-90 days‚ depending on usage and air quality. A dirty filter restricts airflow‚ reducing efficiency and potentially damaging the unit.
Periodically inspect the outdoor unit‚ removing any debris like leaves or branches that could obstruct airflow. Gently clean the outdoor coil with a soft brush or fin comb. Avoid using harsh chemicals or high-pressure water.
Annual professional servicing is recommended‚ including a refrigerant check and system inspection. Proper maintenance ensures efficient operation‚ extends the lifespan of your mini split‚ and maintains air quality within your home.
Understanding the Control System
Your Pioneer mini split system comes equipped with a user-friendly control system‚ typically a remote control‚ allowing for convenient operation and customization. The remote enables you to adjust temperature settings‚ fan speed‚ and operating modes – including cooling‚ heating‚ and auto.
Many models feature a timer function for scheduled operation‚ enhancing energy efficiency and comfort. Explore the remote’s settings to discover features like sleep mode‚ which gradually adjusts the temperature for a comfortable night’s rest.
Some Pioneer systems also offer smart home integration‚ allowing control via smartphone apps. Familiarize yourself with the remote’s buttons and display to maximize your system’s capabilities and enjoy a perfectly climate-controlled environment.
Pioneer Mini Split System Specifications
Pioneer offers a diverse range of mini split systems‚ each with unique specifications to suit various needs. The WYT series‚ for example‚ includes 9K‚ 12K‚ 18K‚ 24K‚ and 36K BTU models‚ catering to different room sizes.
Voltage requirements typically range from 110-120V or 220-240V‚ depending on the model‚ so verifying compatibility with your electrical system is crucial. Refrigerant type is generally R-410A‚ a common and efficient option.
Sound levels vary‚ but Pioneer prioritizes quiet operation‚ with many units operating below 50dB. SEER ratings (Seasonal Energy Efficiency Ratio) indicate energy efficiency‚ with higher numbers signifying better performance. Always consult the specific model’s documentation for precise specifications before installation.
Warranty Information and Support
Pioneer provides warranties on its mini split systems‚ typically covering parts and labor for a specified period. The duration varies by model‚ so reviewing your purchase documentation is essential. Registration of your unit is often required to activate the full warranty coverage.

For technical support‚ Pioneer offers various channels‚ including a customer service hotline and online resources. Many installers also provide post-installation support and can assist with warranty claims.
Online forums and video tutorials‚ like those detailing the installation process‚ can offer troubleshooting assistance. Retain your proof of purchase and the installation manual for warranty purposes. Contact Pioneer directly for specific warranty details and support options related to your model.