NuWave Pro Plus Oven Manual: A Comprehensive Guide
Discover essential guidance for your NuWave Pro Plus, including setup, cooking, cleaning, troubleshooting, and safety—plus access to recipes and accessory information!
Welcome to the world of convenient and efficient cooking with the NuWave Pro Plus Oven! This innovative appliance utilizes infrared technology to cook foods quickly and evenly, offering a healthier alternative to traditional cooking methods. The NuWave Pro Plus isn’t just an oven; it’s a versatile kitchen tool capable of baking, roasting, grilling, and more.
This manual serves as your comprehensive guide, providing detailed instructions on everything from initial setup and operation to cleaning and maintenance. Whether you’re a seasoned chef or a beginner cook, this guide will empower you to unlock the full potential of your NuWave Pro Plus and create delicious meals with ease. Explore included recipes and discover how to adapt your favorites!
Understanding the Key Features
The NuWave Pro Plus boasts several key features designed for optimal cooking performance. Its infrared technology ensures rapid and even heating, reducing cooking times significantly. The spacious cooking cavity accommodates a variety of dish sizes, and the included extension ring expands capacity further.
Precise temperature control and multiple cooking modes – bake, roast, grill, and more – offer versatility for diverse recipes. A user-friendly digital display and control panel simplify operation, while the built-in timer ensures perfect results every time. This oven’s design prioritizes convenience, efficiency, and healthy cooking, making it a standout appliance in any kitchen.
What’s Included in the Box
Upon unboxing your NuWave Pro Plus, you’ll find the main oven base and the removable cooking pot. A glass lid is included for visibility during cooking, alongside the essential power cord for operation. Crucially, the package contains an extension ring, expanding your cooking capacity for larger meals.
You’ll also receive a comprehensive owner’s manual and a recipe book, providing guidance and inspiration. Additionally, recipe cards offer quick meal ideas. A CD containing the owner’s manual is often included as well, ensuring easy access to information. Verify all components are present for a complete setup experience.

Setting Up Your NuWave Pro Plus
Prepare for effortless cooking! This section details initial power-on, control panel familiarization, and understanding the digital display for optimal performance.
Initial Setup and Powering On
Before your first use, carefully unpack the NuWave Pro Plus oven and remove all packaging materials. Ensure all components are present, referencing the “What’s Included in the Box” section. Place the oven on a stable, heat-resistant surface with adequate ventilation.
Connect the power cord to a properly grounded outlet, verifying the voltage matches the oven’s requirements. Avoid using extension cords if possible. Press the power button to initiate the oven; the digital display will illuminate. A brief self-test may occur. It’s crucial to ensure proper grounding for electrical safety, as outlined in the safety precautions.
Allow the oven to run for a short period without food to burn off any manufacturing residue. A slight odor during this initial burn-in is normal.
Familiarizing Yourself with the Control Panel
The NuWave Pro Plus control panel features intuitive buttons for effortless operation. Locate the power button, timer controls (increase/decrease), and temperature adjustment buttons. Understand the function buttons for selecting cooking modes – roast, bake, broil, and more.
The control panel also includes a start/pause button to initiate or interrupt the cooking process. Pay attention to indicator lights that display the oven’s status: heating, timer running, and temperature reached. Familiarize yourself with the menu button for accessing advanced settings and customization options; Proper understanding of these controls ensures optimal cooking performance.
Refer to the “Understanding the Digital Display” section for detailed information on interpreting the displayed values.
Understanding the Digital Display
The NuWave Pro Plus digital display provides crucial information during operation. It prominently shows the set temperature, allowing precise control over your cooking. The remaining cooking time is clearly displayed, counting down to completion. The display also indicates the selected cooking mode – bake, roast, broil, or others – for easy reference.
Error codes, if any, will appear on the display, signaling potential issues. Consult the “Troubleshooting Common Issues” section for decoding these messages. The display brightness is adjustable for optimal visibility. Pay attention to the preheat indicator, confirming when the oven reaches the desired temperature.
Accurate interpretation of the digital display is key to successful cooking.

Cooking with the NuWave Pro Plus
Master delicious meals with ease! Explore preheating, timer functions, temperature controls, versatile cooking modes, and the benefits of the extension ring for larger dishes.
Preheating the Oven
Proper preheating is crucial for optimal cooking results with your NuWave Pro Plus. Begin by ensuring the oven is empty and the power cord is securely connected. Select your desired cooking temperature using the control panel; the digital display will clearly indicate the set temperature.
Allow the oven to preheat for approximately 5-10 minutes, depending on the chosen temperature. The oven will signal when preheating is complete, often with an audible beep or a change in the display.
Preheating ensures even heat distribution, leading to consistently cooked food. Avoid opening the oven during preheating, as this can disrupt the heating process and prolong the preheating time. Always refer to your recipe for specific preheating instructions, as some dishes may benefit from a longer or shorter preheating period.
Using the Timer Function
The NuWave Pro Plus features a convenient timer function for precise cooking control. To activate, press the “Timer” button on the control panel. Use the arrow buttons to adjust the cooking time to your desired duration, displayed clearly on the digital screen.
Once set, press “Start” to initiate both the cooking process and the timer. The oven will automatically shut off when the timer reaches zero, preventing overcooking. You can check the remaining cooking time at any moment on the display.
For added convenience, the timer can be used independently for other kitchen tasks, even without actively cooking. Remember to reset the timer after each use.
Temperature Control and Settings
The NuWave Pro Plus offers precise temperature control, crucial for optimal cooking results. Utilize the “Temp” button on the control panel to adjust the cooking temperature. Arrow buttons allow incremental increases or decreases, displayed prominently on the digital screen.
Temperature settings range from a low warm setting, ideal for keeping food ready, to high heat for searing and crisping. Refer to recipe guidelines for recommended temperatures. Experimentation may be needed to achieve your preferred level of doneness.
Consistent temperature monitoring ensures even cooking throughout the process. Always ensure the correct temperature is selected before initiating the cooking cycle.
Cooking Modes Explained
The NuWave Pro Plus boasts versatile cooking modes for diverse culinary needs. The “Roast” mode excels at browning and crisping meats, while “Bake” provides even heat for cakes and casseroles. “Grill” simulates traditional grilling, perfect for vegetables and proteins.
The “Broil” function delivers intense top-down heat, ideal for melting cheese or finishing dishes. A dedicated “Air Fry” mode circulates hot air for crispy, oil-free results. Explore each mode to unlock its unique capabilities.
Selecting the appropriate mode ensures optimal texture and flavor. Refer to the included recipe book for mode recommendations.
Utilizing the Extension Ring
The NuWave Pro Plus extension ring increases the oven’s capacity, accommodating larger dishes like whole chickens or sizable roasts. Ensure the oven is cool before attaching or removing the ring. Carefully align the ring with the oven base, ensuring a secure fit before powering on.
When using the extension ring, cooking times may need adjustment. Monitor food closely and consider increasing cooking time slightly for optimal results. The ring distributes heat effectively, but larger items may require longer to cook thoroughly.
Always use oven-safe cookware when utilizing the extension ring.

Recipes and Cooking Times
Explore delicious recipes tailored for your NuWave Pro Plus, alongside recommended cooking times for common foods—adapt your favorites for optimal results!
Recommended Cooking Times for Common Foods
Achieving perfect results with your NuWave Pro Plus is easy with these guidelines. For chicken pieces, aim for 25-30 minutes at 375°F. A whole chicken (approximately 3-4 lbs) typically requires 60-75 minutes at the same temperature. Beef steaks, depending on thickness, cook in 15-20 minutes at 400°F for medium-rare.
Pork chops benefit from 20-25 minutes at 375°F, ensuring they remain juicy. Fish fillets, like salmon or cod, are done in just 12-15 minutes at 350°F. Vegetables, such as potatoes and carrots, take around 20-25 minutes at 400°F. Remember these are estimates; always check internal temperatures for food safety and desired doneness!
Recipe Ideas for the NuWave Pro Plus
Unleash your culinary creativity! Try a simple roasted chicken – rub with herbs and spices, then cook to golden perfection. For a quick weeknight meal, prepare salmon with lemon and dill, achieving flaky tenderness in minutes. Experiment with crispy roasted vegetables like Brussels sprouts or sweet potatoes, seasoned with garlic and paprika.
Consider a flavorful pork tenderloin marinated in a sweet and savory sauce. Even desserts are possible – bake a small chocolate lava cake for an indulgent treat! The NuWave Pro Plus excels at both savory and sweet dishes, offering versatility and convenience for all your cooking adventures.
Adapting Traditional Recipes
Transitioning beloved recipes to your NuWave Pro Plus is surprisingly easy! Reduce cooking times by approximately 25-30% compared to a conventional oven, monitoring closely for doneness. Lower temperatures are often sufficient; start with 25 degrees Fahrenheit less than the original recipe suggests.
For recipes calling for broiling, utilize the top heating element, observing carefully to prevent burning. When adapting casseroles or baked goods, the extension ring ensures even cooking and prevents overcrowding. Remember to adjust liquid amounts slightly, as the NuWave retains moisture efficiently, yielding consistently delicious results!
Cleaning and Maintenance
Maintain peak performance with daily cleaning and periodic deep cleans; proper storage extends the life of your NuWave Pro Plus oven—ensuring lasting culinary success!
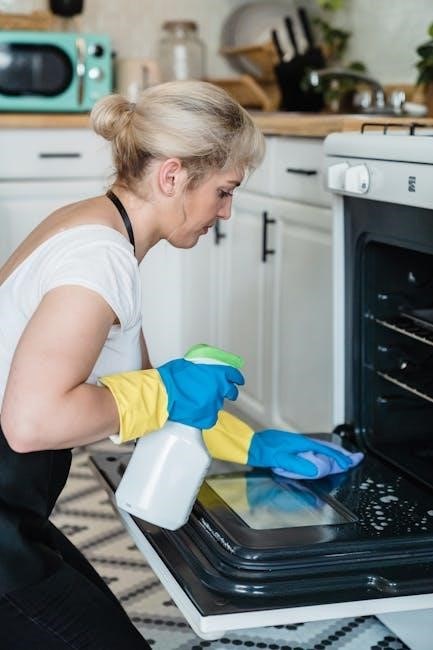
Daily Cleaning Procedures
After each use, allow your NuWave Pro Plus oven to cool completely before beginning the cleaning process. Carefully remove any food residue from the cooking surface using a soft, non-abrasive cloth or sponge. Avoid harsh chemicals or scouring pads, as these can damage the non-stick coating. For stubborn residue, a mild dish soap solution can be used, ensuring thorough rinsing afterward.
The removable splatter screen and drip pan are dishwasher safe, offering convenient cleaning. Wipe down the exterior of the oven with a damp cloth to remove any splatters or fingerprints. Regular daily cleaning prevents buildup and ensures optimal performance, extending the lifespan of your appliance and maintaining food safety.
Deep Cleaning Instructions
For a thorough clean, periodically perform a deep cleaning of your NuWave Pro Plus oven. After cooling, remove all components – cooking surface, splatter screen, and drip pan. Wash these parts with warm, soapy water, paying attention to any baked-on residue. For particularly stubborn areas, create a paste of baking soda and water, applying it and letting it sit before scrubbing gently.
Wipe down the interior of the oven with a damp cloth and mild detergent. Ensure all soap residue is removed. The exterior can be cleaned with a stainless steel cleaner (if applicable). Avoid immersing the oven base in water. Regular deep cleaning maintains hygiene and optimal cooking performance.
Proper Storage of the Oven
When storing your NuWave Pro Plus, ensure it is completely cool and dry. Disconnect the power cord and store it separately to prevent damage. Clean all components thoroughly before storage, as outlined in the cleaning instructions, to avoid odors or residue buildup. Store the oven in a cool, dry place, away from direct sunlight and extreme temperatures.
If possible, store the oven in its original packaging to protect it from dust and scratches. Avoid placing heavy objects on top of the oven during storage. Proper storage extends the lifespan of your NuWave Pro Plus and ensures it’s ready for your next culinary adventure.
Troubleshooting Common Issues
Resolve typical problems like heating failures or error codes with our guide! We’ll help you diagnose and fix issues for optimal cooking performance.
Oven Not Heating
If your NuWave Pro Plus isn’t heating, first ensure it’s properly plugged into a functioning outlet. Verify the power cord isn’t damaged and is securely connected at both ends. Double-check that the oven is set to the correct cooking mode and temperature; sometimes, a simple setting error is the culprit.
Next, examine the heating element for any visible signs of damage or obstruction. A faulty heating element will require replacement. If the digital display shows an error code, consult the “Error Codes and Their Meanings” section for specific troubleshooting steps. If none of these steps resolve the issue, contact NuWave customer support for further assistance, as internal components may need professional evaluation.
Error Codes and Their Meanings
The NuWave Pro Plus utilizes error codes to diagnose potential issues. A code like “E1” might indicate a sensor malfunction, requiring professional service. “E2” could signal a heating element failure, necessitating replacement. “E3” often points to a temperature control problem, potentially needing a control panel reset or repair.
Consult the complete error code list within the full owner’s manual (available on the NuWave website) for a detailed explanation of each code and recommended solutions. Ignoring error codes can lead to further damage or unsafe operation. If an error persists after attempting troubleshooting, contact NuWave customer support for expert guidance.
Addressing Food Not Cooking Properly
If your food isn’t cooking as expected, first verify the correct temperature and time settings. Ensure the extension ring is properly installed if used, as it affects cooking times. Check for proper airflow around the oven; obstructions can hinder heat circulation.
Also, confirm the food is positioned correctly on the cooking surface. Uneven cooking might indicate a need for rotating the food during the process. If issues persist, calibrate the oven following the manual’s instructions. For consistently undercooked food, contact NuWave support—a sensor issue could be present.
Safety Precautions
Always ground the device, keep the cord away from heat, and ensure proper ventilation when operating your NuWave Pro Plus oven for safe use.
Important Safety Warnings
Prioritize safety when using your NuWave Pro Plus Oven. Never immerse the unit, cord, or plug in water or other liquids to prevent electrical shock. Always ensure the oven is properly grounded and the cord remains clear of heated surfaces during operation.
Exercise caution when handling hot surfaces; use oven mitts or pot holders. Avoid touching the heating element directly. Supervise children closely when the oven is in use. Do not operate the appliance with a damaged cord or plug, or after a malfunction.
Disconnect the oven from the power outlet when not in use and before cleaning. Allow it to cool completely before handling or storing. Improper use can result in fire, electrical shock, or personal injury. Read all instructions carefully before operating.
Electrical Safety Guidelines
To ensure safe operation, always plug your NuWave Pro Plus into a properly grounded electrical outlet. Avoid using extension cords, as they can overheat and pose a fire hazard. Never operate the oven with a damaged power cord or plug; replace them immediately.
Do not attempt to repair the appliance yourself. If electrical issues arise, disconnect the oven and contact qualified service personnel. Keep the electrical connection dry and away from water sources. Ensure the voltage of your outlet matches the oven’s specifications.
Regularly inspect the power cord for any signs of damage. Unplug the oven during thunderstorms or prolonged periods of non-use to protect against power surges. Following these guidelines minimizes the risk of electrical shock and ensures safe operation.
Proper Ventilation
Maintaining adequate ventilation is crucial when operating your NuWave Pro Plus oven. Ensure sufficient space around the unit – at least six inches on all sides – to allow for proper airflow. Avoid placing the oven directly against walls or near flammable materials.
During cooking, the oven generates heat and steam. Proper ventilation prevents moisture buildup and overheating, ensuring safe and efficient operation. Do not block the oven’s vents, as this can restrict airflow and potentially damage the appliance.
Consider using the oven in a well-ventilated area, such as a kitchen with an exhaust fan. This helps dissipate heat and odors, creating a more comfortable cooking environment. Always prioritize airflow for optimal performance and safety.
Accessories and Where to Find Them
Enhance your NuWave Pro Plus with available accessories! Explore options and replacement parts through the official NuWave website or authorized retailers online.
Available Accessories for the NuWave Pro Plus
Expand your NuWave Pro Plus cooking capabilities with a range of specialized accessories designed to optimize performance and versatility. The extension ring is a popular choice, increasing cooking capacity for larger meals and whole chickens. Consider the roasting rack for elevated cooking, promoting even heat circulation and crispy results. NuWave also offers a drip pan, simplifying cleanup and preventing messy spills.
Furthermore, specialized baking pans and racks are available for creating cakes, cookies, and other baked goods. Explore options like the NuWave Brio Air Fryer accessories, which may be compatible, offering even more cooking possibilities. Check the official NuWave website and authorized retailers for the most up-to-date accessory catalog and availability.
Finding Replacement Parts
Maintaining your NuWave Pro Plus is easy with readily available replacement parts. The official NuWave website is the primary source for genuine components, including heating elements, control panels, and glass lids. You can also find parts through authorized retailers listed on the NuWave site, ensuring authenticity and quality.
eBay can be a useful resource for older or discontinued parts, but exercise caution and verify seller ratings. When ordering, have your oven’s model number handy to guarantee compatibility. NuWave customer support can also assist in identifying the correct part numbers for your specific needs, ensuring a perfect fit and continued optimal performance.
Warranty Information
Understand your NuWave Pro Plus warranty coverage details, including duration, what’s covered, and how to initiate a claim with NuWave customer support;
Understanding Your Warranty
Your NuWave Pro Plus Oven is covered by a limited warranty, protecting against manufacturing defects in materials and workmanship under normal household use. The warranty period typically begins from the original purchase date, and the length varies depending on the specific model and promotion. It’s crucial to retain your proof of purchase, as it’s required for any warranty claim.
The warranty does not cover damage resulting from misuse, accidents, unauthorized repairs, or failure to follow the instructions in the owner’s manual. Normal wear and tear are also excluded. To determine the exact terms and duration of your warranty, carefully review the warranty documentation included with your oven or visit the official NuWave website.
Contacting NuWave Customer Support
For assistance with your NuWave Pro Plus Oven, several avenues of support are available. You can reach NuWave customer service through their official website, where a comprehensive FAQ section and troubleshooting guides are readily accessible. Direct phone support is also offered during specified business hours; check the website for the most current contact number.
Email support provides another option for submitting inquiries and receiving assistance. Many users also find helpful information and shared experiences within online communities and forums dedicated to NuWave products. Be prepared to provide your oven’s model number and proof of purchase when contacting support to expedite the resolution process.