Electrical conduit installation safeguards wiring, offering a professional, code-compliant pathway for power distribution – a crucial element detailed in installation guides.
What is Electrical Conduit?
Electrical conduit is a tubular protective system for electrical wiring. It acts as a physical barrier, shielding wires from impact, moisture, and chemical exposure, significantly enhancing safety and longevity. Commonly constructed from metal or plastic, conduit comes in various forms – rigid, intermediate, and flexible – each suited for specific applications.
Its primary function is to route and protect electrical conductors, ensuring reliable power delivery. Properly installed conduit minimizes the risk of short circuits and ground faults. Beyond protection, conduit supports wiring, maintaining consistent circuit integrity. Understanding conduit types and their appropriate uses is fundamental to any electrical installation project, as detailed in comprehensive installation guides.
Why Use Electrical Conduit?
Employing electrical conduit offers substantial benefits beyond basic wire protection. It dramatically increases safety, preventing damage from physical impacts and environmental factors like moisture and chemicals. Conduit systems meet stringent building and electrical codes, ensuring compliance and minimizing inspection issues.
Furthermore, conduit facilitates easier future upgrades or modifications to wiring, as conductors can be pulled through existing pathways. It also provides superior grounding, enhancing electrical system reliability. Choosing conduit demonstrates a commitment to long-term durability and a professional installation, as highlighted in detailed installation guides, ultimately safeguarding both property and occupants.

Types of Electrical Conduit
Various conduit types – RMC, IMC, EMT, and LFMC – cater to diverse installation needs, each possessing unique properties detailed within comprehensive installation guides.
Rigid Metal Conduit (RMC)
Rigid Metal Conduit (RMC) is a heavy-duty galvanized steel tubing offering exceptional protection for electrical wiring. It’s renowned for its robust mechanical strength, making it ideal for exposed installations and environments prone to physical damage. RMC requires threading for connections, utilizing specialized tools to create precise, secure joints.
Installation guides emphasize the importance of proper grounding and support spacing, adhering strictly to National Electrical Code (NEC) requirements. Due to its weight and rigidity, RMC installations can be more labor-intensive than other conduit types. However, its durability and resistance to corrosion make it a long-lasting and reliable choice for critical applications, particularly where maximum protection is paramount. Careful planning and accurate measurements are essential for successful RMC installations.
Intermediate Metal Conduit (IMC)
Intermediate Metal Conduit (IMC) presents a balance between the strength of Rigid Metal Conduit (RMC) and the lighter weight of Electrical Metallic Tubing (EMT). Constructed from galvanized steel, IMC offers substantial mechanical protection for conductors, suitable for various indoor and outdoor applications. While requiring threading for connections like RMC, IMC’s thinner walls simplify bending and cutting, reducing installation time.
Installation guides highlight that IMC is a cost-effective alternative to RMC where extreme physical protection isn’t necessary. Proper grounding and adherence to NEC spacing requirements remain crucial. IMC’s lighter weight facilitates easier handling, but still necessitates appropriate support systems. It’s a versatile option providing a robust, reliable pathway for electrical wiring, balancing durability with ease of installation.
Electrical Metallic Tubing (EMT) ⎻ Thinwall Conduit
Electrical Metallic Tubing (EMT), often called thinwall conduit, is a lightweight, pre-galvanized steel tubing commonly used for indoor wiring applications. Unlike Rigid Metal Conduit (RMC), EMT doesn’t require threading; connections are typically made using compression fittings or set-screw connectors, streamlining installation. Installation guides emphasize its suitability for exposed locations and dry environments, offering a cost-effective and efficient wiring solution.
However, EMT provides less physical protection than RMC or IMC. The NEC dictates specific support spacing requirements for EMT to prevent sagging and maintain structural integrity. While easier to bend and cut, proper bending techniques are vital to avoid kinking. It’s crucial to remember that conduit fill calculations must be followed diligently to ensure safe and compliant wiring practices.
Liquidtight Flexible Metal Conduit (LFMC)
Liquidtight Flexible Metal Conduit (LFMC) is designed for wet or corrosive environments where standard conduit isn’t suitable. Its construction features a flexible metal core bonded to a liquidtight plastic jacket, providing exceptional protection against moisture, chemicals, and physical damage. Installation guides highlight its use in applications like outdoor runs, near sprinkler systems, and in areas subject to frequent cleaning.
LFMC is particularly useful where vibration or movement is present, as its flexibility accommodates these conditions. Proper grounding is critical with LFMC, ensuring continuity through the conduit’s metallic core. Specialized fittings are required to maintain the liquidtight seal, and adherence to NEC guidelines regarding support and fill capacity is essential for a safe and compliant installation.
Planning Your Conduit Installation
Careful planning, including route assessment and code review, is vital for a successful conduit installation, ensuring efficiency and safety as detailed in guides.
Evaluating the Installation Area
Thorough assessment of the installation route is paramount before commencing any work. Prioritize accessibility, opting for the shortest and most direct pathways between electrical sources and outlets. This strategic approach minimizes material waste and contributes to a cleaner, more professional final result.
Consider potential obstructions – walls, ceilings, existing structures – and plan accordingly. Note any areas requiring special attention, such as those prone to moisture or physical damage. A detailed evaluation ensures a smooth installation process, reducing unforeseen complications and adhering to safety standards outlined in comprehensive installation guides. Proper planning saves time and resources, leading to a robust and reliable electrical system.
Reviewing Local Regulations and Electrical Codes
Compliance is critical; a thorough understanding of local building codes and electrical regulations is non-negotiable before starting any conduit installation. These guidelines dictate safe practices and ensure your work meets all necessary standards. Familiarize yourself with specific requirements regarding conduit type, fill capacity, support spacing, and grounding methods.
Consult your local authority having jurisdiction (AHJ) for clarification on any ambiguous points. Ignoring these regulations can lead to failed inspections, costly rework, and potential safety hazards. Detailed electrical conduit installation guides often reference the National Electrical Code (NEC), but local amendments always take precedence. Prioritize safety and adherence to the law.
Determining Conduit Fill Capacity
Accurate fill calculations are essential for safe and code-compliant conduit installations. The National Electrical Code (NEC) dictates maximum allowable fill percentages to prevent overheating and facilitate future wire pulls. This percentage varies based on the number of conductors within the conduit.
Installation guides provide tables and formulas to determine the appropriate conduit size for a given number and size of wires. Consider wire insulation thickness when calculating cross-sectional areas. Overfilling conduit can damage insulation and create a fire hazard, while underfilling can be inefficient. Always consult NEC guidelines for precise requirements.

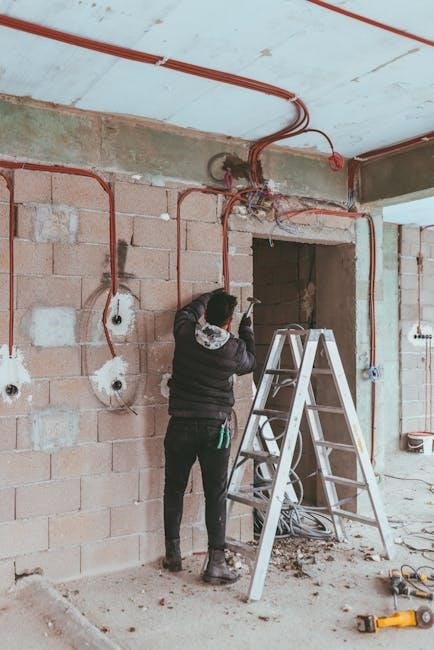
Conduit Installation Techniques
Proper techniques involve precise cutting, bending, and joining of conduit sections, ensuring secure support and adherence to electrical codes for safety.
Cutting and Bending Conduit
Accurate cutting and bending are fundamental to successful conduit installations. Utilize appropriate conduit cutters – wheel cutters for smaller sizes, and saws for larger diameters – ensuring clean, burr-free cuts. Bending requires specialized conduit benders, matched to the conduit type and size, to achieve precise angles without kinking or flattening.
Carefully measure and mark bending locations, referencing bending charts for accurate results. Gradual, controlled bending minimizes stress on the conduit. Remember that different conduit materials (RMC, IMC, EMT) have varying bending radii and require specific techniques. Always double-check measurements and bends before securing the conduit, as corrections can be difficult and compromise the installation’s integrity. Proper technique ensures a professional finish and code compliance.
Threading Conduit (for RMC & IMC)
Rigid Metal Conduit (RMC) and Intermediate Metal Conduit (IMC) necessitate threading for secure, watertight connections. Employ a conduit threading machine with the correct die size for the conduit’s trade size; Lubricate the die and conduit exterior to reduce friction and ensure clean threads.
Consistent pressure and rotation are crucial during threading; avoid forcing the machine, which can damage the die or conduit. Inspect threads for uniformity and remove any burrs with a deburring tool. Proper threading creates a mechanically strong and electrically continuous pathway. Always verify thread compatibility before assembling fittings, and use thread sealant to enhance watertightness and prevent corrosion, adhering to NEC guidelines.
Supporting Conduit – Spacing and Methods
Proper conduit support is vital for safety and code compliance. The National Electrical Code (NEC) dictates maximum spacing between supports, varying by conduit size and type. Generally, RMC and IMC require supports every 10 feet, while EMT needs support every 3 feet.
Utilize straps, clamps, and hangers designed for the specific conduit type. Ensure supports are securely fastened to building structures. Avoid over-tightening, which can damage the conduit. For long runs, consider using conduit bodies for added support and pull points. Proper support prevents sagging, strain on connections, and potential damage, ensuring a durable and reliable electrical system.

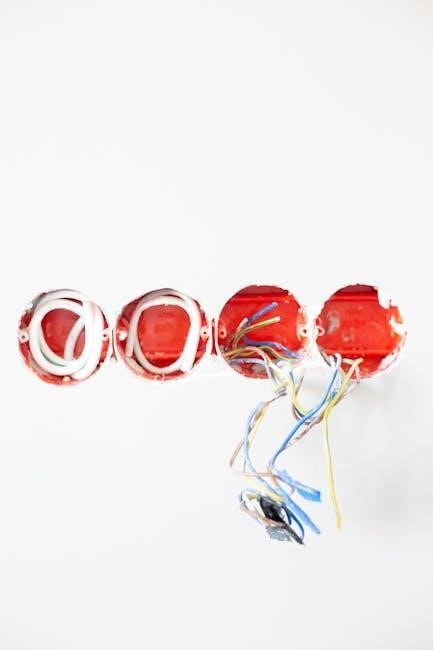
Wiring Within Conduit
Conduit wiring requires specific wire types and adherence to fill capacity rules, ensuring safe and efficient electrical current flow within the raceway.
Wire Types Suitable for Conduit
Selecting the correct wire for conduit is paramount for safety and performance. THHN/THWN-2 is a commonly used conductor, known for its heat and moisture resistance, making it ideal for many conduit applications. UF cable, while sometimes permitted, isn’t generally recommended within conduit due to its design for direct burial.
NM-B (Romex) is not suitable for installation inside conduit; it’s designed for open-air or concealed-in-wall runs. The National Electrical Code (NEC) dictates acceptable wire types based on the conduit material and environmental conditions. Always verify compatibility. Consider the ampacity requirements of the circuit when choosing wire gauge, ensuring it meets or exceeds the load. Proper wire selection prevents overheating and potential fire hazards, guaranteeing a reliable electrical system.
Conduit Fill Calculations & NEC Requirements
Accurate conduit fill calculations are critical for NEC compliance and preventing damage to conductors. The NEC (National Electrical Code) specifies maximum fill percentages based on the number of wires. For example, a 40% fill limit applies when three or more conductors are present. Calculations involve determining the cross-sectional area of each wire, including insulation, and summing them.
This total area must be less than or equal to 40% of the conduit’s internal area. Tables within the NEC provide conduit internal diameters and allowable fill areas. Overfilling can cause overheating, making wire pulling difficult, and potentially violating safety codes. Always consult the latest NEC edition for precise requirements and applicable amendments.

Grounding and Bonding
Proper grounding and bonding are vital for safety, utilizing conduit as an equipment ground, and mitigating electromagnetic interference (EMI) as detailed in guides.
Grounding Conduit Systems
Establishing a robust grounding system is paramount when utilizing electrical conduit. Metal conduit, specifically, must be effectively grounded to provide a low-impedance path for fault currents, ensuring rapid clearing of electrical faults and minimizing shock hazards. This involves bonding the conduit to the electrical system’s grounding electrode conductor, typically at the service panel.
Continuity of the grounding path is critical; all conduit sections must be securely joined using approved fittings and bonding jumpers where necessary. Careful attention must be paid to transitions between different conduit types, ensuring consistent grounding throughout the entire system. Refer to the National Electrical Code (NEC) for specific requirements regarding grounding electrode systems and bonding techniques, as detailed in comprehensive installation guides.
EMI Considerations and Shielding
Electromagnetic Interference (EMI) can disrupt sensitive electronic equipment. Metal conduit, particularly Rigid Metal Conduit (RMC) and Intermediate Metal Conduit (IMC), inherently provides some shielding against EMI. However, for applications requiring enhanced protection – such as in industrial settings or near radio frequency sources – additional shielding measures may be necessary.
Proper grounding of the conduit system is crucial for effective EMI shielding. Ensuring continuous metallic pathways and minimizing gaps in the conduit run helps to contain electromagnetic radiation. Specialized shielded conduit and fittings are also available for demanding applications. Installation guides often detail specific techniques for maximizing shielding effectiveness, referencing NEC guidelines for appropriate grounding and bonding practices to mitigate EMI concerns.
Finishing the Installation
Final steps involve securely connecting conduit to boxes and equipment, followed by a thorough inspection and testing to verify safety and code compliance.
Connecting Conduit to Boxes and Equipment
Securely attaching conduit to electrical boxes and equipment is paramount for a safe and lasting installation. Utilize appropriate connectors – ranging from set-screw connectors for rigid conduit to compression connectors for EMT – ensuring a tight, weatherproof seal.
Proper grounding is vital at these connection points; bonding bushings and locknuts maintain electrical continuity. Carefully align the conduit before tightening, avoiding stress on the box or equipment.
Inspect connections for any gaps or looseness, and always follow manufacturer’s instructions for specific connector types. Remember, a poorly connected conduit system compromises safety and can lead to electrical faults. Double-check all connections before energizing the circuit.
Inspection and Testing
Thorough inspection and testing are critical final steps in any conduit installation. Visually examine all conduit runs for proper support, secure connections, and absence of physical damage. Verify that all fittings are tightened correctly and grounding connections are intact.
Utilize a continuity tester to confirm a solid electrical path through the conduit system and grounding conductors.
Perform insulation resistance tests to detect any potential shorts or ground faults. Document all test results and address any deficiencies immediately. A final inspection by a qualified electrical inspector ensures compliance with local codes and guarantees a safe, reliable installation.

Reference Standards & Resources
Essential resources include the National Electrical Code (NEC), relevant annexes (A, B, C), and local amendments for safe, compliant conduit installations.
National Electrical Code (NEC)
The National Electrical Code (NEC) is the cornerstone of safe electrical installations, providing comprehensive guidelines for conduit systems. It dictates proper conduit fill capacities, ensuring wires aren’t damaged and heat doesn’t build up. NEC articles cover acceptable conduit types for various applications, detailing requirements for Rigid Metal Conduit (RMC), Intermediate Metal Conduit (IMC), and Electrical Metallic Tubing (EMT).
Furthermore, the NEC specifies grounding and bonding procedures for conduit, crucial for protecting against electrical shock and mitigating electromagnetic interference. Understanding NEC requirements for supporting conduit – spacing and methods – is vital for a structurally sound installation. Adherence to the NEC isn’t just best practice; it’s legally mandated, ensuring installations meet safety standards and pass inspections. Regularly updated editions reflect evolving technologies and safety concerns.
Relevant Annexes (e.g., Annex A: Threading, Annex B: Grounding)
Essential annexes within comprehensive installation guides provide detailed support for core principles. Annex A typically focuses on conduit threading – a critical skill for RMC and IMC installations, detailing proper die selection, lubrication, and thread engagement. Annex B delves into grounding and electromagnetic interference (EMI) considerations, outlining techniques for effective grounding and shielding to minimize noise and ensure system integrity.
These annexes often include practical tables, diagrams, and troubleshooting tips. They clarify complex concepts, offering step-by-step guidance for installers. Annex C often lists relevant reference standards, ensuring compliance with industry best practices. Utilizing these annexes significantly enhances installation quality and adherence to safety regulations.