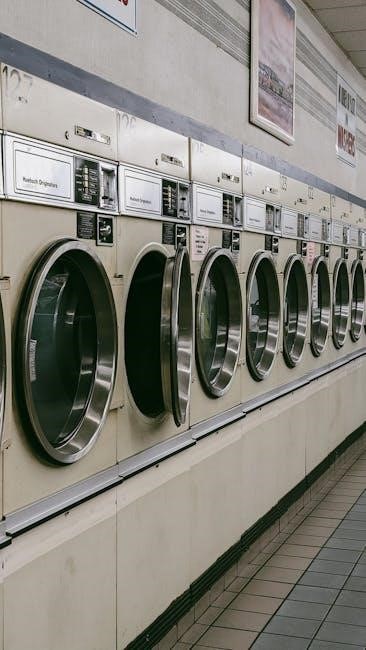
Water softener regeneration is crucial for maintaining consistently soft water, addressing issues like hard water return and appliance damage.
Understanding the process allows for proactive troubleshooting when automatic cycles fail, ensuring optimal performance and preventing costly repairs.
Manual regeneration becomes necessary when automatic cycles are disrupted, or when hard water symptoms reappear, demanding immediate attention.
What is Water Softener Regeneration?
Water softener regeneration is the process of replenishing the resin beads within the softener that remove hardness minerals like calcium and magnesium. Over time, these beads become saturated with these minerals, reducing the softener’s effectiveness. Regeneration involves a series of cycles – brine draw, backwash, rinse, and brine refill – to flush out the accumulated hardness and restore the resin’s ion exchange capacity.
Essentially, it’s a cleaning cycle for the softener itself. The brine solution, created from salt in the brine tank, is used to flush away the hardness minerals. A properly functioning regeneration cycle is vital for consistently soft water, preventing scale buildup in pipes and appliances, and ensuring optimal softener performance. Ignoring regeneration leads to hard water issues returning.
Why Manual Regeneration is Sometimes Necessary
Automatic regeneration relies on a timer or metered system, but these can sometimes fail or become misaligned. If you notice hard water returning, despite the softener seemingly operating, manual regeneration is often required. Issues like power outages can disrupt the automatic cycle, necessitating a manual reset. Furthermore, if the softener experiences a prolonged period of inactivity, the resin beads may require a manual cleaning to restore their effectiveness.
Unexpectedly high water usage can also overwhelm the system, prompting a manual cycle. Ultimately, manual regeneration provides a reliable way to ensure consistent water softening, bypassing potential electronic or mechanical failures and guaranteeing soft water when you need it most.

Understanding the Regeneration Cycle
Regeneration involves several stages: brine draw, backwash, rinse, brine refill, and slow rinse, all working to cleanse the resin and restore softening capacity.
The Stages of a Typical Regeneration Cycle
A typical regeneration cycle consists of five distinct stages, each playing a vital role in restoring the water softener’s efficiency. First, the brine draw phase pulls salt-rich water from the brine tank. Next, the backwash stage reverses water flow, flushing out sediment and resin bed compaction.
Following this, the rinse stage removes residual brine solution. The brine refill phase replenishes the brine tank with water, dissolving salt for the next cycle. Finally, the slow rinse ensures all remaining brine is cleared, preparing the softener for regular operation.
Understanding these stages is key to troubleshooting any regeneration issues and maintaining optimal water quality.
How Often Should a Water Softener Regenerate?
Regeneration frequency depends on water hardness, water usage, and the softener’s capacity. Most modern systems regenerate automatically, typically every few days or when a pre-set water volume has been processed. However, if you notice diminishing water softness, more frequent regeneration might be needed.
A softener displaying the “REGENERATE WATER SOFTENER” message, indicating low salt levels (around 25 liters remaining), signals an impending cycle. Ignoring this can lead to hard water issues. Monitoring water quality and adjusting settings based on consumption ensures efficient operation and prevents unnecessary salt usage.
Preparing for Manual Regeneration
Before initiating a manual regeneration, gather supplies, turn off the main water supply, and set the softener to regeneration mode for optimal results.
Gathering Necessary Supplies
Before beginning the manual regeneration process, ensure you have all the necessary supplies readily available to avoid interruptions. First, confirm you have an adequate supply of water softener salt – typically rock salt or solar salt – to refill the brine tank afterward.
A bucket and a wet/dry vacuum can be incredibly useful for addressing any potential salt bridge formations within the brine tank, ensuring proper brine draw.
Additionally, have a flashlight handy to inspect the brine tank’s interior. Finally, keep a towel or absorbent material nearby to clean up any minor spills that might occur during the regeneration cycle. Proper preparation streamlines the process and minimizes potential issues.
Turning Off the Water Supply
Prior to initiating manual regeneration, completely shut off the water supply to the water softener. Locate the bypass valve, usually positioned before and after the softener unit in the plumbing line. Switch the valve to the “bypass” position; this isolates the softener, allowing water to flow through your home without being processed.
This step is crucial to prevent water from continuously flowing during the regeneration cycle, which could cause overflows or damage.
Double-check that water flow to the softener is indeed stopped before proceeding; A small amount of residual water may remain in the lines, but the main supply should be halted.
Setting the Water Softener to Regeneration Mode
Once the water supply is bypassed, it’s time to manually initiate the regeneration cycle. Locate the control valve on your water softener – this is typically a digital or mechanical timer. Depending on your model, you’ll need to either press a “Regenerate” button or manually turn the dial to the “Regeneration” or “Recharge” setting.
Consult your water softener’s manual for specific instructions, as procedures vary between manufacturers.
Some systems require holding a button for a few seconds, while others have a dedicated regeneration start sequence. Ensure the system acknowledges your command, often indicated by a flashing light or display message.
Step-by-Step Manual Regeneration Process
Initiate the process by following the stages: brine draw, backwash, rinse, brine refill, and slow rinse – each crucial for restoring resin capacity effectively.
Step 1: Brine Draw
The brine draw phase is the initial step in regeneration, where the water softener pulls salt-rich brine from the brine tank. This process utilizes the venturi effect, creating suction to draw the brine solution up the draw tube and into the resin tank.
During this stage, the concentrated salt solution begins to flush the resin beads, reversing the ion exchange process and replenishing the sodium ions. It’s vital to ensure sufficient salt levels in the brine tank prior to initiating regeneration for a successful draw. Observe the flow; a consistent draw indicates proper function, while interruptions suggest potential issues with the draw tube or venturi.
Step 2: Backwash
The backwash phase is critical for cleaning the resin bed and expelling accumulated sediment and iron particles. Water is forced upward through the resin tank, lifting and expanding the bed, allowing trapped debris to be flushed out to the drain.
This process not only cleans the resin but also redistributes the resin beads, preventing channeling and ensuring even water flow. A clear backwash discharge indicates effective cleaning; cloudy water suggests a heavily loaded resin bed or potential issues with pre-filtration. Proper backwashing is essential for maintaining optimal softener performance and extending resin life.
Step 3: Rinse
The rinse cycle follows the backwash, serving to settle the resin bed and flush out any remaining loosened debris and brine solution. Water now flows downward through the tank, compacting the resin beads into their operational position.
This phase ensures that no brine contaminates the softened water supply. Continue the rinse until the water runs clear and free of any salty taste or odor, indicating complete removal of residual brine. A thorough rinse is vital for delivering consistently soft, high-quality water and preventing salt from entering your home’s plumbing.
Step 4: Brine Refill
The brine refill stage is where the water softener replenishes its brine solution for the next regeneration cycle. Water slowly enters the brine tank, dissolving salt to create a concentrated brine solution.
This process typically takes several hours, depending on the softener’s settings and tank size. Monitor the water level in the brine tank, ensuring it fills to the appropriate level – usually indicated by a fill float. Proper brine concentration is essential for effective resin cleaning and optimal softening performance. Avoid overfilling, as this can lead to salt wastage and potential issues.
Step 5: Slow Rinse
The final slow rinse stage flushes any remaining brine solution from the resin tank, preparing the softener for normal operation. This slow, deliberate rinse ensures all traces of salt are removed, preventing salty-tasting water.
The control valve directs water through the resin bed at a reduced flow rate, maximizing contact time for thorough cleaning. This stage typically lasts for a shorter duration than previous cycles. Once completed, the water softener automatically returns to its service mode, providing soft water. Verify water clarity to confirm complete brine removal before resuming normal water usage.

Troubleshooting Regeneration Problems
Persistent issues during regeneration—like being stuck or failing to start—demand immediate attention to restore soft water and prevent damage.
Addressing these promptly avoids hard water’s effects and costly repairs.
Water Softener Stuck in Regeneration Mode
A water softener endlessly stuck in regeneration signifies a critical malfunction, often indicated by continuous trickling water. This persistent cycle wastes water and salt, signaling a problem within the control valve or regeneration process. The first step is to immediately switch on the bypass valve to halt the cycle and restore water flow, albeit untreated.
Consulting a troubleshooting guide, like the one previously mentioned, is essential. Inspect the control valve for any obstructions or malfunctions; A faulty valve can prevent the softener from completing the cycle. If the issue persists, professional assistance is recommended to diagnose and repair the underlying cause, preventing further water waste and potential damage.
Water Softener Not Regenerating at All
If your water softener refuses to regenerate, you’ll likely notice the return of hard water issues – spotty dishes, scale buildup, and dry skin. This indicates a failure in the automatic regeneration process, demanding immediate attention. Common culprits include issues within the brine tank, such as salt bridging or low salt levels, preventing the draw of necessary brine.
Faulty timers or motors can also halt the regeneration sequence. Clogged injector lines obstruct brine flow, hindering the process. A proactive approach involves checking salt levels, inspecting for salt bridges, and verifying the functionality of the timer and motor. Addressing these issues can often restore automatic regeneration.
Low Water Pressure During Regeneration
Experiencing reduced water pressure specifically during the regeneration cycle often points to restrictions within the softener’s internal components. A partially clogged injector or venturi is a frequent cause, hindering proper water flow. Sediment buildup within the resin tank can also contribute to pressure drops. Inspecting and cleaning these components is crucial for restoring optimal pressure.
Ensure the drain line isn’t kinked or blocked, as this restricts wastewater expulsion. A faulty control valve might also be the source, impacting water flow regulation. Addressing these issues will not only improve water pressure during regeneration but also ensure efficient operation.
Common Causes of Regeneration Issues
Salt bridge formation, clogged injectors, and faulty timers frequently disrupt regeneration cycles, leading to hard water and reduced softener efficiency.
Salt Bridge Formation in the Brine Tank
A salt bridge occurs when undissolved salt forms a hard crust on the surface of the water in the brine tank, preventing the softener from drawing the necessary saline solution for regeneration.
This crust acts as a barrier, hindering the dissolving process and ultimately leading to insufficient brine concentration. Consequently, the resin beads aren’t properly cleansed of accumulated hardness minerals.
Symptoms include a water softener that fails to regenerate effectively, resulting in hard water breakthrough. To resolve this, carefully break up the salt bridge with a tool like a broom handle, avoiding damage to the tank. Ensure proper salt type and levels to prevent future occurrences.
Clogged Injector or Venturi
A clogged injector or venturi is a frequent cause of regeneration failure, disrupting the brine draw process essential for cleaning the resin beads. These components are responsible for creating the vacuum that pulls brine from the tank.
Sediment, rust, or undissolved salt can accumulate, restricting water flow and hindering the creation of sufficient suction. This results in insufficient brine being drawn into the resin tank, leading to inadequate cleaning and hard water issues.
Inspect and clean the injector and venturi regularly, removing any debris. Consider flushing the system to eliminate accumulated sediment and ensure optimal performance during regeneration.
Faulty Timer or Control Valve
A malfunctioning timer or control valve can severely disrupt the regeneration cycle, preventing it from initiating or completing correctly. These components orchestrate the entire process, dictating when each stage occurs.
If the timer is inaccurate or the control valve fails to switch between stages – brine draw, backwash, rinse, and refill – regeneration will be compromised. This can manifest as constant regeneration or a complete failure to regenerate.
Testing the control valve and timer is crucial. Replacement may be necessary if they are faulty, restoring proper sequencing and ensuring effective water softening.

Maintaining Your Water Softener for Optimal Regeneration
Regular maintenance, including salt level checks and brine tank cleaning, is vital for consistent regeneration and preventing issues like salt bridge formation.
Regularly Check Salt Levels
Consistent salt levels are paramount for successful water softener regeneration. Aim to inspect your brine tank monthly, ensuring sufficient salt remains to create the necessary brine solution. Low salt levels directly impede the regeneration process, leading to hard water breakthrough and reduced softener efficiency.
Ideally, maintain a salt level at least halfway up the tank. Avoid letting the salt level drop too low, as this can cause the unit to draw air and potentially damage components. Furthermore, be mindful of salt bridging – a hard crust forming over the salt – which prevents it from dissolving properly. Break up any bridges with a tool to ensure adequate salt availability for optimal regeneration cycles.
Cleaning the Brine Tank
Periodic brine tank cleaning is essential for preventing regeneration issues. Over time, salt residue and sediment accumulate, potentially forming salt bridges or clogging the intake valve. Aim to clean the tank annually, or more frequently if you notice excessive buildup or salt bridging.
Begin by removing any remaining salt. Then, use warm water and a mild detergent to scrub the tank’s interior, removing all sediment and debris. Rinse thoroughly to eliminate any soap residue. Inspect the brine well and intake valve for obstructions, clearing any blockages. A clean brine tank ensures efficient brine production, vital for effective resin regeneration and consistently soft water.
Inspecting and Cleaning Injector/Venturi
The injector and venturi are critical components in the regeneration process, responsible for creating the necessary suction to draw brine from the tank. A clogged injector or venturi significantly hinders regeneration, leading to hard water. Inspect these parts annually for mineral buildup or debris.
Carefully disassemble the injector and venturi, following the manufacturer’s instructions. Use a small brush or needle to clear any obstructions within the narrow passages. Rinse thoroughly with clean water to ensure complete removal of debris. Reassemble carefully, ensuring proper alignment. A clean injector/venturi guarantees efficient brine draw, optimizing resin regeneration and water softening performance.
Advanced Troubleshooting
Detailed diagnostics involve testing the control valve’s functionality and meticulously checking for any leaks within the system, ensuring optimal performance.
Testing the Control Valve
Thorough control valve testing is essential for diagnosing regeneration issues. Begin by disconnecting power to the softener for safety. Carefully inspect the valve body for cracks or physical damage, indicating potential failure. Next, manually advance the valve through each cycle – service, backwash, rinse, brine draw, and slow rinse – observing its movement and listening for unusual noises.
Pay close attention to whether the valve transitions smoothly between cycles. If resistance is felt, or the valve gets stuck, it suggests internal component problems. Use a multimeter to check the motor’s continuity, confirming it receives power and functions correctly. A faulty motor prevents proper cycling. Finally, examine the valve’s electrical connections for corrosion or loose wiring, which can disrupt signals and hinder regeneration.
Checking for Leaks
Leak detection is paramount during and after regeneration, as water loss impacts efficiency and can cause damage. Begin by inspecting all connections – the inlet/outlet, brine line, drain line, and around the control valve – for drips or pooling water. Examine the brine tank for any signs of leakage, particularly around the salt lid and bottom seams.
A persistent trickle during regeneration often indicates a stuck valve or faulty seal. Check the drain line for consistent flow even during non-regeneration periods, suggesting a valve issue. Address leaks immediately by tightening connections or replacing worn parts. Ignoring leaks wastes water and can lead to more significant problems, hindering optimal softener performance.

When to Call a Professional
Persistent issues, like constant regeneration or complete failure despite troubleshooting, necessitate expert intervention for accurate diagnosis and repair.
Don’t hesitate to seek a qualified technician to avoid further damage or costly replacements.
Signs You Need Professional Help
Recognizing when DIY efforts are insufficient is vital. If your water softener remains stuck in regeneration mode despite attempting a manual reset and bypass valve adjustments, professional assistance is crucial.
Similarly, a complete inability to initiate regeneration, coupled with a return to hard water, signals a deeper problem beyond simple troubleshooting. Consistent trickling water, indicating a stuck valve, also warrants a technician’s expertise.
Furthermore, if you suspect internal component failure – like a faulty timer or control valve – or encounter persistent low water pressure during regeneration, it’s best to consult a qualified professional; Ignoring these signs can lead to extensive damage and expensive repairs.
Finding a Qualified Water Softener Technician
Locating a skilled technician requires careful consideration. Seek recommendations from neighbors, online reviews, or your local hardware store for reputable water softener specialists.
Verify the technician’s credentials and ensure they possess specific experience with your water softener’s brand and model. A licensed and insured professional offers peace of mind and guarantees quality workmanship.
Before hiring, obtain detailed quotes from multiple technicians, outlining the scope of work and associated costs. Don’t hesitate to ask about their diagnostic process and repair strategies. A trustworthy technician will clearly explain the issue and provide transparent pricing.