Watco Danish Oil Instructions: A Comprehensive Guide
Watco Danish Oil offers a beautiful, hand-rubbed finish, enhancing wood grain while providing durable protection. This guide details application,
preparation, and maintenance for optimal results, ensuring a lasting, attractive surface. Explore the intricacies of this popular wood finish!
Understanding Watco Danish Oil
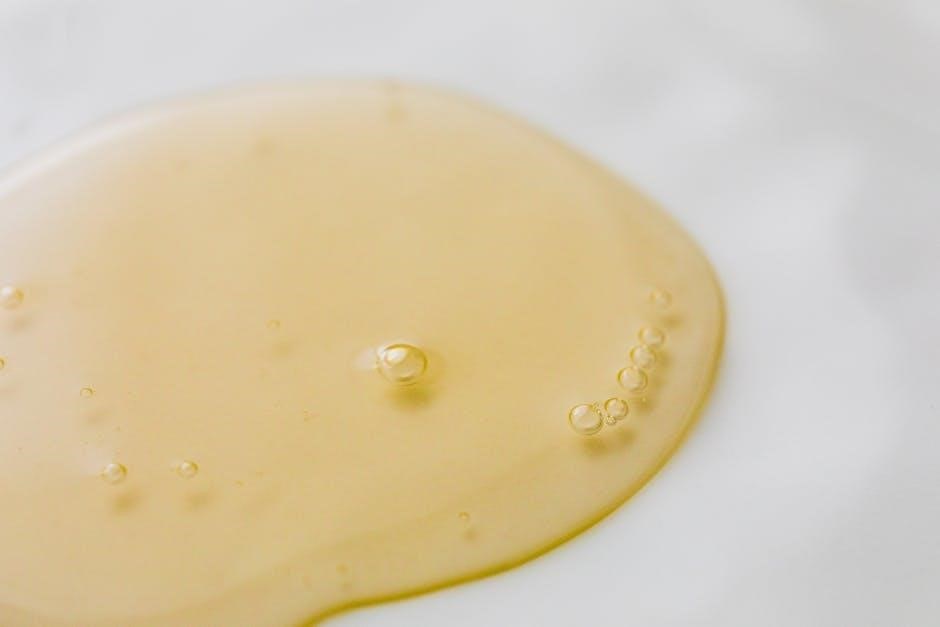
Watco Danish Oil isn’t a single surface coating, but a penetrating oil finish. Unlike varnishes or lacquers that form a film on the wood, Danish Oil soaks into the wood pores, enhancing its natural beauty and providing protection from within. This oil blend typically consists of linseed oil, mineral spirits, and sometimes other drying oils and additives.
The key characteristic is its ability to highlight wood grain, creating a warm, hand-rubbed appearance. It’s favored for furniture, cabinets, and other wood projects where a natural look is desired. Because it penetrates, it doesn’t chip or crack like film-forming finishes. However, it offers less surface protection, requiring periodic reapplication for sustained durability.
Understanding this penetrating nature is crucial for proper application. Multiple thin coats are essential, allowing each coat to fully absorb before applying the next. This builds up the finish gradually, maximizing protection and aesthetic appeal. It’s a relatively easy finish to apply, making it popular with both beginners and experienced woodworkers.
What is Watco Danish Oil?
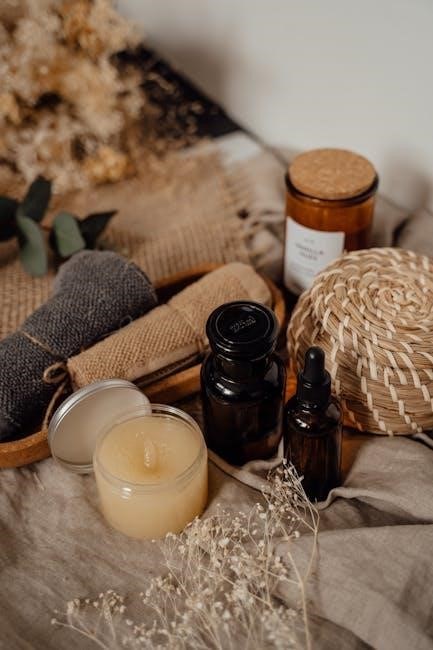
Watco Danish Oil is a popular oil finish designed to penetrate and saturate wood surfaces, rather than forming a protective film on top. It’s a blend primarily composed of refined linseed oil and mineral spirits, with added components to accelerate drying and enhance its properties. This formulation allows the oil to seep into the wood pores, bringing out the natural grain patterns and providing a warm, rich appearance.
Originally inspired by traditional Danish furniture finishes, Watco Danish Oil offers a low-sheen, hand-rubbed look. It’s available in various tones – natural, light walnut, dark walnut, and cherry – to complement different wood species and desired aesthetics. Unlike polyurethane or varnish, it doesn’t create a plastic-like coating, preserving the wood’s tactile feel.
Watco Danish Oil is ideal for projects where a natural, durable finish is desired, such as furniture, interior woodwork, and gun stocks. It’s known for its ease of application and repair, making it a favorite among woodworkers of all skill levels. It’s important to note that it requires multiple coats for optimal protection.
Benefits of Using Watco Danish Oil
Watco Danish Oil provides numerous advantages for wood finishing projects. Its penetrating nature deeply saturates the wood, enhancing the natural grain and creating a beautiful, hand-rubbed appearance that many find superior to film-forming finishes. This penetration also offers excellent protection from within, resisting scratches and minor damage more effectively than surface coatings.
A key benefit is its ease of application and repair. Unlike varnishes or polyurethanes, Danish Oil is simple to apply with a cloth, and damaged areas can be easily touched up without stripping the entire finish; It doesn’t require specialized equipment or extensive experience.
Furthermore, Watco Danish Oil allows the wood to “breathe,” reducing the risk of cracking or blistering, especially in interior applications. It’s also available in various tones to achieve desired color variations. The finish is relatively low in VOCs compared to some other options, and it provides a warm, inviting aesthetic that complements a wide range of wood types and styles.
Preparation is Key
Proper preparation is crucial for a successful Watco Danish Oil finish. Thorough sanding, cleaning, and wood selection guarantee optimal oil absorption and a beautiful, lasting result.
Wood Selection and Suitability
Watco Danish Oil excels on various wood types, but understanding suitability is key. It’s particularly stunning on open-grained woods like oak, ash, and walnut, where it beautifully penetrates and enhances the natural grain patterns. These woods readily absorb the oil, resulting in a rich, lustrous finish.
However, Watco also works well on closed-grain woods such as maple and birch, though they require more coats for adequate penetration. Softer woods like pine and fir benefit from the oil’s protective qualities, but may need additional coats to prevent denting and wear. Avoid using Danish Oil on wood that has been previously sealed with varnish, lacquer, or polyurethane, as the oil won’t penetrate these surfaces effectively.

Consider the intended use of the wood item. For high-wear surfaces like tabletops or floors, hardwoods are generally preferred. For decorative items or furniture with less contact, softer woods can be suitable. Always ensure the wood is completely dry and free of any existing finishes before applying Watco Danish Oil for the best possible outcome.
Surface Preparation: Sanding
Proper sanding is paramount for successful Watco Danish Oil application. Begin with a coarser grit sandpaper – typically 80 or 100 grit – to remove any existing finish, imperfections, or raised grain. This initial sanding establishes a flat, even surface. Progress to finer grits, such as 120 or 150, to smooth out the scratches left by the coarser paper.
For the final sanding, use 180 or 220 grit sandpaper. This creates a very smooth surface, allowing the oil to penetrate evenly and produce a beautiful finish. Always sand with the grain of the wood to avoid unsightly scratches. After sanding, thoroughly remove all sanding dust using a tack cloth, vacuum, or compressed air.
A clean, dust-free surface is crucial; any remaining dust will interfere with the oil’s penetration and result in a blotchy or uneven finish. Pay close attention to edges and corners, ensuring they are properly sanded and rounded to prevent the oil from pooling. Remember, the quality of your sanding directly impacts the final appearance of your project.
Cleaning the Wood Surface
Thorough cleaning is essential after sanding, ensuring optimal Watco Danish Oil adhesion and a flawless finish. Begin by vacuuming the entire wood surface to remove loose dust and debris. Following vacuuming, utilize a tack cloth – a slightly sticky cheesecloth – to capture any remaining fine particles. Gently wipe the surface, applying light pressure, and frequently fold the cloth to reveal a clean area.
For surfaces with grease, wax, or other contaminants, a mild solvent-based cleaner, such as mineral spirits, is recommended. Apply the cleaner to a clean cloth (never directly onto the wood) and wipe the surface, removing any residue. Allow the solvent to fully evaporate before proceeding.
Avoid using water-based cleaners, as they can raise the wood grain and interfere with oil absorption. A clean, dry surface is paramount; any lingering contaminants will prevent the Danish Oil from penetrating properly, leading to an uneven and unsatisfactory result. Inspect the wood carefully to confirm complete cleanliness before application.
Application Process
Applying Watco Danish Oil is a simple, yet rewarding process. Use a clean cloth, applying a liberal coat with the grain. Allow it to penetrate for 15-30 minutes, then wipe off excess!
Applying the First Coat
The initial application of Watco Danish Oil is crucial for establishing a solid foundation for the subsequent coats and achieving the desired finish. Begin by ensuring your workspace is well-ventilated and protected, as Danish oil is flammable. Using a clean, lint-free cloth – old t-shirts work exceptionally well – generously apply the oil to the wood surface, working with the grain. Don’t be shy; the wood needs to be thoroughly saturated.
The goal isn’t to create a thick film on top, but rather to allow the oil to penetrate deep into the wood pores. Apply the oil liberally, covering the entire surface evenly. Pay attention to end grain, as it absorbs more oil than the face grain. After applying the oil, allow it to sit and penetrate for approximately 15 to 30 minutes. This dwell time is vital for proper absorption.
After the allotted time, use a clean section of your cloth to thoroughly wipe off all excess oil from the surface. This is a critical step! Leaving excess oil will result in a sticky, uneven finish. Wipe in the direction of the grain, ensuring no puddles or residue remain. The wood should appear damp, not wet. Proper wiping is key to a beautiful, professional-looking result.
Wet Sanding Between Coats
Wet sanding between coats of Watco Danish Oil is a technique that significantly enhances the smoothness and overall quality of the finish. After the first coat has thoroughly dried – typically 24 hours, but check the product label – lightly dampen a 320-grit sandpaper with mineral spirits or water; The lubricant prevents the sandpaper from clogging and creates a finer scratch pattern.
Gently sand the entire surface, following the wood grain. Apply even pressure, avoiding excessive force. The goal isn’t to remove the oil, but to knock down any raised grain or imperfections that have become apparent after the first coat. The mineral spirits or water will create a slurry; this is normal and aids in the sanding process.
Frequently wipe away the slurry with a clean cloth to maintain visibility and prevent re-depositing abrasive particles. After sanding, thoroughly wipe the surface clean with a fresh cloth dampened with mineral spirits to remove any remaining residue. Allow the surface to dry completely before applying the next coat of Danish oil. This step ensures optimal adhesion and a beautifully smooth final finish.
Applying Subsequent Coats
Applying subsequent coats of Watco Danish Oil builds depth of color and enhances the protective qualities of the finish. After the first coat has fully cured – allowing at least 24 hours drying time – and the surface has been wet sanded (as previously described), you’re ready for the next application. Ensure the wood surface is completely clean and free of dust before proceeding.
Apply the second coat in the same manner as the first: liberally apply the oil with a brush, cloth, or spray applicator, ensuring even coverage. Allow the oil to penetrate the wood for 5-15 minutes, depending on the wood’s porosity and desired saturation. Then, thoroughly wipe off all excess oil with a clean, lint-free cloth. This is crucial; leaving excess oil will result in a sticky, uneven finish.
Repeat the wet sanding process after the second coat dries. Typically, two to three coats are sufficient, but more coats can be applied for a richer, more durable finish. Allow each coat to dry and cure fully before applying the next, and always wet sand between coats for optimal results.
Drying and Curing
Drying and curing Watco Danish Oil are vital for a lasting finish. Allow ample time for each coat to fully dry and harden, ensuring optimal protection and beauty.
Drying Time Considerations
Watco Danish Oil’s drying time isn’t fixed; several factors significantly influence it. Typically, the first coat will be dry to the touch within a few hours, but achieving full curing takes considerably longer – often 24 to 72 hours, depending on conditions. Subsequent coats generally dry faster, around 4-6 hours to the touch.
Temperature plays a crucial role. Warmer temperatures accelerate drying, while cooler temperatures slow it down. Humidity is another key factor; high humidity extends drying times as the oil absorbs moisture from the air. Good ventilation is essential to facilitate evaporation and speed up the process. Avoid applying in damp or poorly ventilated areas.
The wood species also impacts drying. Porous woods like pine absorb oil more quickly than denser hardwoods like maple. The thickness of the oil application matters too – heavier coats require longer drying periods. Patience is key; rushing the process can lead to a tacky or uneven finish. Always test a small, inconspicuous area first to gauge drying time under your specific conditions.
Proper Curing Techniques
Achieving a truly durable and beautiful finish with Watco Danish Oil hinges on proper curing, extending beyond simply being “dry to the touch.” Allow ample time – ideally a week or more – for the oil to fully polymerize within the wood fibers. This process strengthens the finish and enhances its resistance to water, scratches, and everyday wear.
During the curing period, avoid placing heavy objects on the surface or subjecting it to significant abrasion. Light dusting is permissible, but refrain from aggressive cleaning or polishing. Maintaining a stable temperature and humidity level in the room promotes even curing. Exposure to direct sunlight or extreme temperature fluctuations should be avoided.

To accelerate curing slightly, you can provide gentle warmth, but avoid direct heat sources. A well-ventilated space remains crucial throughout the curing process. Remember, a fully cured finish will exhibit a richer depth of color and a more resilient surface. Patience during this phase is rewarded with a lasting, professional-quality result.
Factors Affecting Drying Time
Several environmental and application-related factors significantly influence the drying time of Watco Danish Oil. Temperature plays a crucial role; warmer temperatures generally accelerate drying, while cooler temperatures prolong it. Humidity also impacts the process, with higher humidity slowing down the oil’s absorption into the wood.
The type of wood itself is a key determinant. Porous woods like pine absorb oil more quickly than denser hardwoods like maple. The number of coats applied will also extend the overall drying time – each subsequent coat requires its own curing period. Furthermore, the thickness of each coat influences drying; thinner coats dry faster.
Proper ventilation is paramount, as Watco Danish Oil dries through oxidation. Good airflow ensures sufficient oxygen reaches the oil, facilitating the curing process. Avoid applying the oil in poorly ventilated spaces. Finally, the age of the oil can subtly affect drying time; older oil may exhibit slightly slower absorption rates.

Maintenance and Refinishing
Regular cleaning with a soft cloth preserves the finish. Spot repairs address minor scratches easily. Re-application of Danish Oil periodically restores luster and protection, maintaining beauty.
Cleaning Finished Surfaces
Maintaining the beauty of your Watco Danish Oil finish is surprisingly simple with routine cleaning. For everyday dust and light grime, a soft, lint-free cloth is usually sufficient. Gently wipe the surface, following the wood grain, to avoid scratching. Avoid abrasive cleaners, scouring pads, or harsh chemicals, as these can damage the finish and remove the protective oils.
For more stubborn dirt or spills, dampen the cloth with a mild soap solution – a few drops of dish soap in warm water will do. Wring the cloth thoroughly so it’s barely damp, and wipe the affected area. Immediately follow with a clean, dry cloth to remove any soap residue. Never allow water to pool on the surface, as this can lead to watermarks or damage the wood.
Periodically, you can use a furniture polish specifically designed for oiled finishes. These polishes help replenish the oils and enhance the sheen. Always test the polish in an inconspicuous area first to ensure compatibility. Remember, the goal is gentle cleaning and preservation, not aggressive scrubbing or chemical treatments. Consistent, careful cleaning will keep your Watco Danish Oil finish looking its best for years to come.
Spot Repairing Scratches
Minor scratches on a Watco Danish Oil finish are often easily repaired, restoring the wood’s appearance without a full refinishing; Begin by cleaning the scratched area with a soft cloth to remove any dirt or debris. For very light scratches, simply applying a small amount of Watco Danish Oil to the scratch with a clean cloth and gently rubbing with the grain can often minimize its visibility.
For slightly deeper scratches, lightly sand the affected area with very fine-grit sandpaper (400-grit or higher), moving with the grain. Be extremely gentle to avoid creating more damage. After sanding, clean away any dust with a tack cloth. Apply a small amount of Watco Danish Oil to the sanded area, allowing it to penetrate for 5-10 minutes;
Wipe off any excess oil with a clean, lint-free cloth. You may need to apply a second coat for deeper scratches, allowing each coat to dry completely before applying the next. Blending the repaired area with the surrounding finish is key; feather the edges of the oil application to create a seamless transition. Patience and a light touch are crucial for successful scratch repair.
Re-Applying Danish Oil for Restoration
Over time, a Watco Danish Oil finish may lose its luster or become worn, necessitating re-application for restoration. Begin by thoroughly cleaning the surface to remove dirt, grime, and any existing polish buildup. A mild cleaner and a soft cloth are ideal. Lightly scuff-sand the entire surface with very fine-grit sandpaper (400-grit or higher) to create a better bonding surface for the new oil – always sand with the grain.
Remove all sanding dust with a tack cloth. Apply a generous coat of Watco Danish Oil, working it into the wood grain with a clean cloth. Allow the oil to penetrate for 15-30 minutes, depending on the wood’s porosity. After the penetration period, thoroughly wipe off all excess oil with a clean, lint-free cloth. This is crucial to prevent a sticky or uneven finish;
Allow the surface to dry completely, typically 24-72 hours, depending on environmental conditions. Multiple thin coats are preferable to one thick coat. Repeat the application process if desired, ensuring each coat is fully dry before applying the next, to achieve the desired level of richness and protection.

Safety Precautions
Watco Danish Oil is flammable; avoid sparks and open flames. Ensure adequate ventilation during application and drying. Wear gloves and eye protection, and properly dispose of oil-soaked rags.

Ventilation Requirements
Watco Danish Oil contains solvents that release vapors during application and curing. Proper ventilation is absolutely crucial for a safe working environment. These vapors can be irritating to the eyes, nose, and throat, and prolonged exposure can lead to more serious health effects.
Always work in a well-ventilated area, ideally with open windows and doors to create a cross-breeze. If natural ventilation isn’t sufficient, utilize fans to circulate air and exhaust fumes outdoors. In enclosed spaces, consider using a respirator equipped with organic vapor cartridges to minimize inhalation of the solvent vapors.

Avoid working in basements or other poorly ventilated areas. Be mindful of the wind direction when working outdoors to prevent vapors from drifting into inhabited spaces. It’s also important to note that the flammability of the oil is increased by the presence of vapors, so good ventilation helps reduce fire risk as well. Prioritize your health and safety by ensuring adequate airflow throughout the entire process.
Handling and Disposal
Watco Danish Oil requires careful handling to ensure safety and environmental responsibility. Always wear appropriate personal protective equipment, including gloves, to prevent skin contact. Avoid getting the oil in your eyes; if contact occurs, flush immediately with plenty of water and seek medical attention. Keep the container tightly closed when not in use to prevent evaporation and potential fire hazards.
Used oil rags are a significant fire risk due to spontaneous combustion. Immediately after use, spread rags in a single layer on a non-combustible surface, such as concrete, and allow them to dry completely outdoors. Alternatively, place the rags in a sealed, water-filled metal container for disposal.
Do not dispose of oil or contaminated materials down drains or into the environment. Check with your local waste management authorities for proper disposal procedures for oil-based products. Following these guidelines will help protect your health, prevent fires, and minimize environmental impact. Responsible handling is key!
Flammability Concerns
Watco Danish Oil is a flammable liquid and must be handled with extreme caution. The oil has a relatively low flash point, meaning it can ignite easily from heat, sparks, open flames, or static discharge. Ensure adequate ventilation during application and drying to prevent the build-up of flammable vapors. Keep the oil away from all sources of ignition, including pilot lights, electrical equipment, and smoking materials.
As previously mentioned, oil-soaked rags pose a serious fire hazard. These rags can spontaneously combust even after appearing dry. Proper disposal, as detailed in the ‘Handling and Disposal’ section, is crucial. Never store oily rags in piles or enclosed containers.
In the event of a fire, use a Class B fire extinguisher designed for flammable liquids. Water may spread the fire. Always review the Safety Data Sheet (SDS) for detailed information on flammability hazards and appropriate fire-fighting measures. Prioritizing fire safety is paramount when working with Watco Danish Oil.