Understanding Your 16-Quart Presto Pressure Cooker
Finding a replacement manual for your 16-quart Presto is now easier! Numerous models – PCA4, PCC6, and others – are covered in available resources online, often as free PDFs.
Compatible Models
This information pertains to a wide array of Presto pressure cookers and canners! Models like 01/PCA4, 01/PCA6, 01/PCC4, and numerous others (including 103, 204, 406, 603, 706) are supported by readily available replacement manuals. A-series and B-series models, such as A401 and B301, are also frequently included, ensuring broad compatibility for finding instructions.
Key Components and Their Functions
Essential parts include the pressure regulator, safety valve, lid locking mechanism, and sealing gasket – all crucial for safe and effective operation of your Presto cooker.
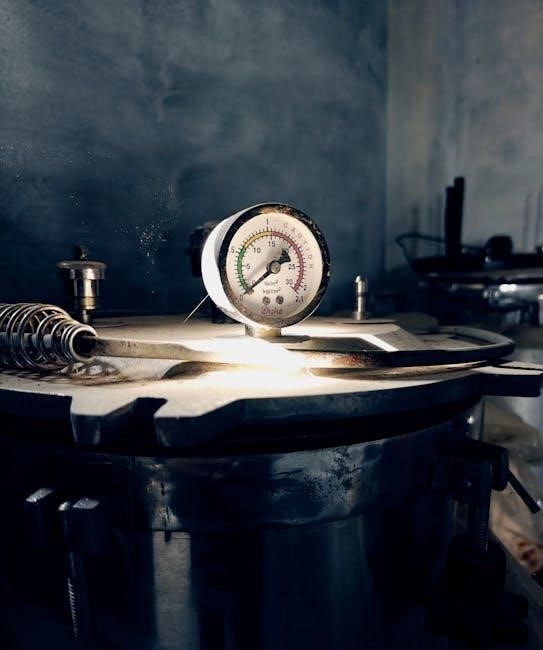
Pressure Regulator and Weighted Gauge
The pressure regulator, often a weighted gauge, maintains consistent pressure during cooking. It releases excess steam to prevent dangerously high pressure buildup. Understanding its function is vital; a rattling gauge indicates proper pressure. Different weights correspond to different pressure levels, impacting cooking times. Ensure the regulator is clean and moves freely for optimal performance and safety. Refer to your manual for specific weight recommendations.
Safety Valve
The safety valve is a crucial feature, acting as a backup to the regulator. It automatically releases pressure if the primary regulator fails, preventing explosions. Never attempt to block or tamper with this valve! Regularly inspect it to ensure it’s clear of obstructions. A functioning safety valve is paramount for safe pressure cooking; consult your manual for location and testing procedures.
Lid Locking Mechanism
The lid locking mechanism ensures a secure seal during operation. It prevents the lid from being opened while pressure is present inside the cooker. Never force the lid open; allow the pressure to release naturally or use the quick-release method as described in your manual. Proper locking is vital for safety, preventing burns and injuries.
Gasket and Sealing Ring
The gasket and sealing ring create an airtight seal between the pot and lid, essential for building pressure. Regularly inspect the gasket for cracks, hardness, or damage. Gasket replacement is necessary periodically to maintain optimal performance and safety. A worn gasket will prevent proper pressure build-up and could lead to leaks.

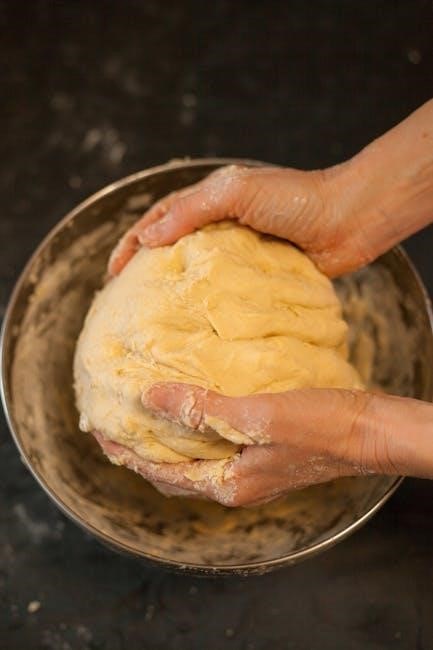
Preparing for First Use
Initial inspection of your Presto is crucial; ensure all parts are present and undamaged before the water testing phase, as outlined in the manual.
Initial Inspection
Before first use, carefully unpack your 16-quart Presto and verify all components are included, referencing the manual’s parts list. Inspect the pot for dents or damage. Check the lid’s sealing ring and ensure it’s flexible and properly seated. Examine the pressure regulator, weighted gauge, and safety valves for any obstructions or defects. A thorough inspection guarantees safe and effective operation.
Water Testing
Perform a water test before cooking food to confirm proper sealing. Add 2-3 cups of water to the 16-quart Presto, secure the lid, and heat on high. Observe the pressure regulator; steam should release steadily. If it doesn’t seal, re-check the gasket. This test verifies functionality and familiarizes you with the pressure build-up process.
Operating Instructions: Pressure Cooking
Begin by adding food and sufficient liquid to the cooker; Secure the lid properly, allowing pressure to build during heating, and then adjust cooking time.
Adding Food and Liquid
When pressure cooking, always ensure adequate liquid is present – typically at least 2 cups for the 16-quart model – to generate necessary steam. Food should not be packed too tightly, allowing for even heat distribution. Avoid overfilling; a maximum fill line exists for safety.
Remember to consult your recipe for specific liquid requirements, as these vary depending on the ingredients and desired outcome.
Securing the Lid
Proper lid alignment is crucial for safe operation. Ensure the lid is correctly positioned with the arrow markings aligned, then rotate until it locks securely into place. Never force the lid; it should lock smoothly.
Verify the locking mechanism engages fully before applying heat. A properly sealed lid is essential for building and maintaining pressure during the cooking process.
Achieving Pressure
Bring the cooker to high heat to initiate pressure build-up. Watch for the pressure regulator to begin rocking gently, or the weighted gauge to indicate the correct pressure.
Adjust heat to maintain consistent pressure, reducing it once the desired level is reached. Consistent pressure is key for even cooking and safe operation, avoiding excessive steam release.
Cooking Time and Pressure Levels
Cooking times vary based on food type and quantity; recipes will specify appropriate durations. Typically, 15 PSI is used for faster cooking, while lower pressures suit delicate foods.
Always refer to tested recipes for safe processing times, especially for canning; Adjust cooking time based on altitude, as higher elevations require increased processing durations for optimal results.

Operating Instructions: Pressure Canning
Canning requires precise timing and jar preparation for food safety. Consult tested recipes for recommended processing times based on your altitude and food type.
Recommended Canning Times
Determining correct canning times is crucial for safe food preservation. Always refer to current, research-based canning guides – like those from the USDA – for specific recommendations. Processing times vary significantly based on the food being canned (fruits, vegetables, meats), jar size, and your elevation.
Failure to follow tested recipes can result in spoilage or, more seriously, botulism. Consult reliable sources; do not rely on outdated information or family recipes without verification.
Proper Jar Preparation
Before canning, thoroughly wash jars in hot, soapy water and rinse well. Sterilize jars by boiling them for 10 minutes, or running them through a sterilize cycle in your dishwasher. Inspect jars for chips or cracks, discarding any damaged ones.
Keep jars hot until filling to prevent thermal shock. Lids and bands should also be heated (not boiled) according to manufacturer instructions to ensure a proper seal.

Troubleshooting Common Issues
Common problems include sealing issues, steam leaks, and food burning. Refer to your manual for solutions, ensuring proper lid locking and pressure regulation.
Lid Won’t Seal
If the lid isn’t sealing, first inspect the gasket for cracks, nicks, or hardening; replacement is often necessary. Ensure the lid is correctly aligned and securely locked into place. Also, verify there’s no food debris obstructing the sealing surface. A worn or damaged gasket is a frequent cause, and consulting your manual’s diagrams can help with proper assembly.
Excessive Steam Release
Consistent, excessive steam escaping before pressure builds indicates a problem. Check the pressure regulator and weighted gauge for proper placement and cleanliness. Ensure the lid is fully sealed and locked. Insufficient liquid can also cause this, so verify the minimum fill line is met. Refer to your manual for specific troubleshooting steps and safety guidelines.
Food Burning
Burnt food often results from insufficient liquid or too high a heat setting. Always use the recommended amount of liquid specified in your recipe or the manual. Reduce the heat after reaching pressure, and avoid overly sugary foods that scorch easily. Stirring occasionally can also prevent sticking and burning during the cooking process.

Cleaning and Maintenance
Regular hand washing is recommended for all parts, excluding the electric base. Replace the gasket periodically to maintain a proper seal, ensuring safe operation.
Hand Washing Instructions
After each use, carefully wash the lid, pot, and any removable parts with warm, soapy water. Avoid abrasive cleaners that could damage the surfaces. Pay close attention to the gasket and sealing ring, ensuring they are free from food particles. Thoroughly dry all components before reassembling and storing your 16-quart Presto cooker.
Gasket Replacement
Regularly inspect your gasket for cracks, hardening, or deformation. A worn gasket compromises the seal, impacting safety and performance. Replacement gaskets are readily available for various Presto models. Ensure you purchase the correct gasket for your specific cooker. Follow the manual’s instructions for safe and proper installation of the new gasket.
Proper Storage
Store your Presto cooker in a clean, dry location, away from direct sunlight. Ensure the gasket is removed for long-term storage to prevent sticking and deterioration. Keep all components together, ideally in the original box, to avoid losing parts. Proper storage extends the cooker’s lifespan and maintains its functionality.
Safety Precautions
Always avoid overfilling the cooker, and never attempt to force the lid open while pressure remains. Regularly inspect all parts for wear or damage.
Avoiding Overfilling
Crucially, never exceed the maximum fill line indicated within your 16-quart Presto. Food expands during pressure cooking, and overfilling can obstruct the steam release mechanisms. This obstruction poses a significant safety risk, potentially leading to a dangerous buildup of pressure. Liquids, especially starchy ones, require extra caution, as they foam and thicken considerably. Always adhere to recipe guidelines regarding maximum fill levels for safe operation.
Never Force the Lid Open
Attempting to force the lid open while pressure remains inside is extremely dangerous. Always ensure the pressure regulator has fully released all steam and the pressure indicator has returned to zero. Gently attempt to open; if resistance persists, wait longer. Forcing the lid can cause a sudden, forceful release of hot contents, resulting in severe burns and potential injury.
Regular Inspection of Parts
Consistent inspection is crucial for safe operation. Before each use, check the gasket for cracks or hardening, and the safety valve for obstructions. Ensure the lid locking mechanism functions smoothly. Replace worn or damaged parts immediately; readily available replacements exist for many Presto models, ensuring continued safe and effective use.

Understanding Pressure Cooking vs. Canning
Pressure cooking and canning differ significantly in process and purpose; cooking prioritizes speed, while canning focuses on long-term food preservation using specific times.
Differences in Process
Pressure cooking utilizes high steam pressure for rapid cooking, typically with shorter processing times and focusing on meal preparation. Pressure canning, however, requires precise, longer heating periods at specific pressures to eliminate harmful bacteria and create a vacuum seal for safe, shelf-stable preservation.
Canning demands careful jar preparation and adherence to tested recipes, unlike the more flexible nature of pressure cooking.
Appropriate Uses for Each Method
Pressure cooking excels at quickly preparing soups, stews, meats, and vegetables – ideal for weeknight meals. Pressure canning is specifically for preserving foods like fruits, vegetables, meats, and pickles for long-term storage, ensuring food safety and reducing waste.
Never use pressure cooking methods for long-term preservation; always utilize proper canning procedures.

Recipe Ideas for Your 16-Quart Presto
Explore diverse recipes! From hearty soups and flavorful stews to tender meat dishes, your 16-quart Presto unlocks a world of culinary possibilities.
Soups and Stews
The 16-quart capacity excels at soups and stews! Quickly create rich, flavorful broths and tenderize tough cuts of meat in a fraction of the time. Explore recipes for classic beef stew, hearty vegetable soup, or creamy chicken noodle – the Presto simplifies complex flavors. Larger batches are perfect for meal prepping and freezing, ensuring delicious, convenient meals throughout the week.
Meat Dishes
Transform tougher, less expensive cuts of meat into tender masterpieces! The Presto’s pressure cooking capabilities dramatically reduce cooking times for roasts, ribs, and pulled pork. Achieve fall-off-the-bone tenderness in under an hour. Explore recipes for pot roast, short ribs, or even flavorful, shredded chicken – perfect for tacos or sandwiches.
Using Your Presto on Different Cooktops
Compatibility varies; older weighted gauge models may not work on induction. Check your model and cooktop specifications for optimal performance and safety.
Compatibility with Electric, Gas, and Induction
Generally, Presto pressure cookers function well on electric and gas stovetops. However, induction compatibility is a concern, particularly with older models featuring a weighted gauge. A flat bottom is crucial for efficient heat transfer. Newer Presto models are often induction-ready, but always verify your specific model number against the manufacturer’s guidelines to ensure safe and effective operation on an induction cooktop.
Finding Replacement Parts
Gaskets, valves, and other components are readily available online and through retailers specializing in pressure cooker parts for various Presto models.
Where to Purchase Gaskets, Valves, and Other Components
Replacement parts for your 16-quart Presto can be sourced from several locations. Online retailers like Amazon and specialized appliance parts stores frequently stock Presto components. Additionally, the official Presto website may offer direct purchasing options. Local hardware stores, particularly those with robust kitchen appliance sections, sometimes carry common parts like gaskets and sealing rings. Checking online forums dedicated to pressure cooking can also reveal valuable supplier recommendations from fellow users.
Downloading a Replacement Manual
Free PDF versions of Presto manuals, covering many models including yours, are readily accessible online through various websites dedicated to appliance instructions.
Accessing Digital Copies Online
Numerous websites host downloadable Presto pressure cooker manuals, catering to a wide range of models like the 16-quart versions. Searching for your specific model number (e.g., 0174510, 0178209) will yield direct links to PDF files. Resources include sites archiving appliance documentation, offering free access to instruction and recipe books, ensuring you can quickly restore lost guidance.

Presto Model Number Identification
Locate the model number – crucial for finding the correct manual – typically on the cooker’s base or body; examples include A403A or 0174510.
Locating the Model Number on Your Cooker
Identifying your Presto’s model number is the first step to accessing the correct manual and replacement parts. Typically, you’ll find this number stamped or affixed to the bottom of the cooker’s base. Look closely – it might be within a recessed area.
Alternatively, check the cooker’s body for a label. Common formats include codes like ‘A403A’, ‘0174510’, or similar alphanumeric sequences. Having this number readily available streamlines finding compatible resources online.